
1. はじめに
The GameMax Expedition is a compact Micro ATX PC gaming case designed for efficient cooling and component compatibility. This manual provides instructions for the proper installation, operation, and maintenance of your PC case.

Figure 1.1: GameMax Expedition MATX PC Gaming Case, White.
2. 安全情報
- インストールまたはメンテナンスを行う前に、必ずすべてのコンポーネントの電源を切断してください。
- 静電気放電 (ESD) によるコンポーネントの損傷を防ぐために、静電気防止リスト ストラップを着用してください。
- シャーシ内部の鋭利な部分に注意してください。
- 小さな部品やネジは子供の手の届かないところに保管してください。
- Ensure proper ventilation around the case during operation.
3. パッケージ内容
パッケージにすべてのアイテムが揃っていることを確認します。
- GameMax Expedition MATX PC Gaming Case
- 付属品ボックス(ネジ、スタンドオフ、ケーブルタイ)
- 1 x 120mm Blue LED Fan (pre-installed at rear)
- ユーザーマニュアル(このドキュメント)
4 製品の特徴
- Micro Gaming Chassis: Compact design optimized for gaming components.
- I/O ポート: 1 x USB 3.0, 2 x USB 2.0, and HD Audio ports located on the top panel.
- 冷却: Includes 1 x 120mm Blue LED fan. Supports additional fans for enhanced airflow.
- サイドウィンドウ: Full side window panel allows visibility of internal components.
- 磁気ダストフィルター: Removable dust filter on the top panel for easy cleaning and improved system longevity.
- GPU Bracket: Integrated bracket provides support for graphics cards, preventing sag and accommodating larger cards.
5.コンポーネントオーバーview
5.1外部 Views

Figure 5.1: Front panel design with air intake and included 120mm fan illustration.

Figure 5.2: Top I/O panel featuring USB 3.0, USB 2.0, and audio ports.
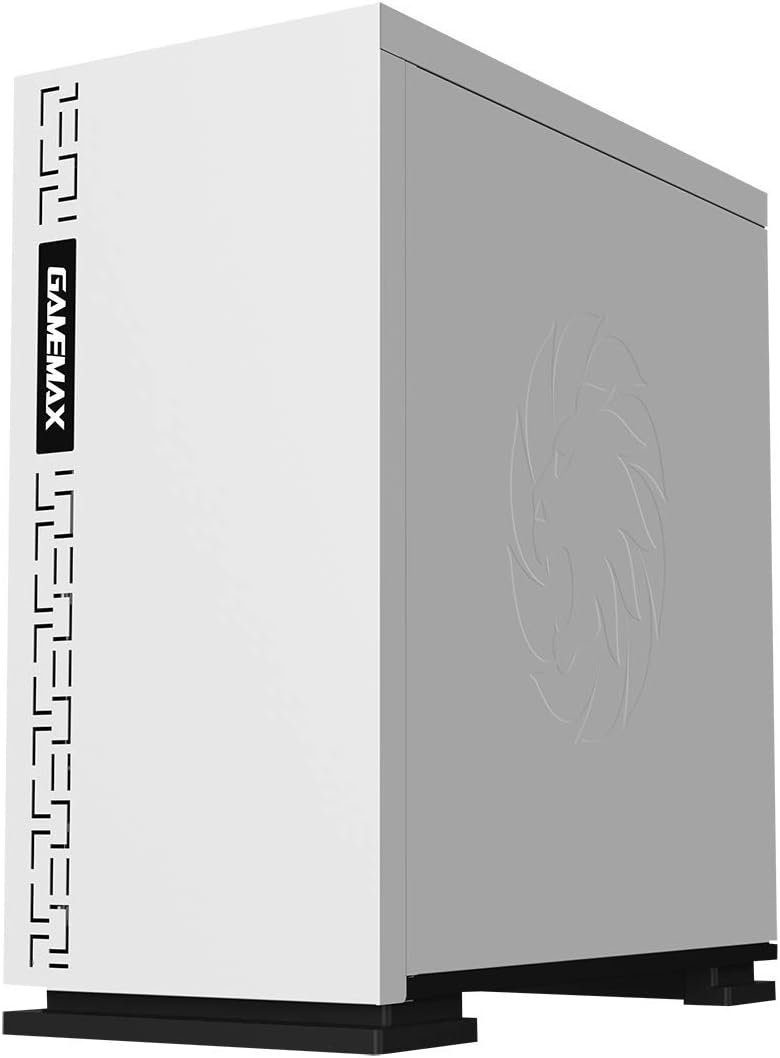
図5.3:上 view showing the magnetic dust filter for fan ventilation.
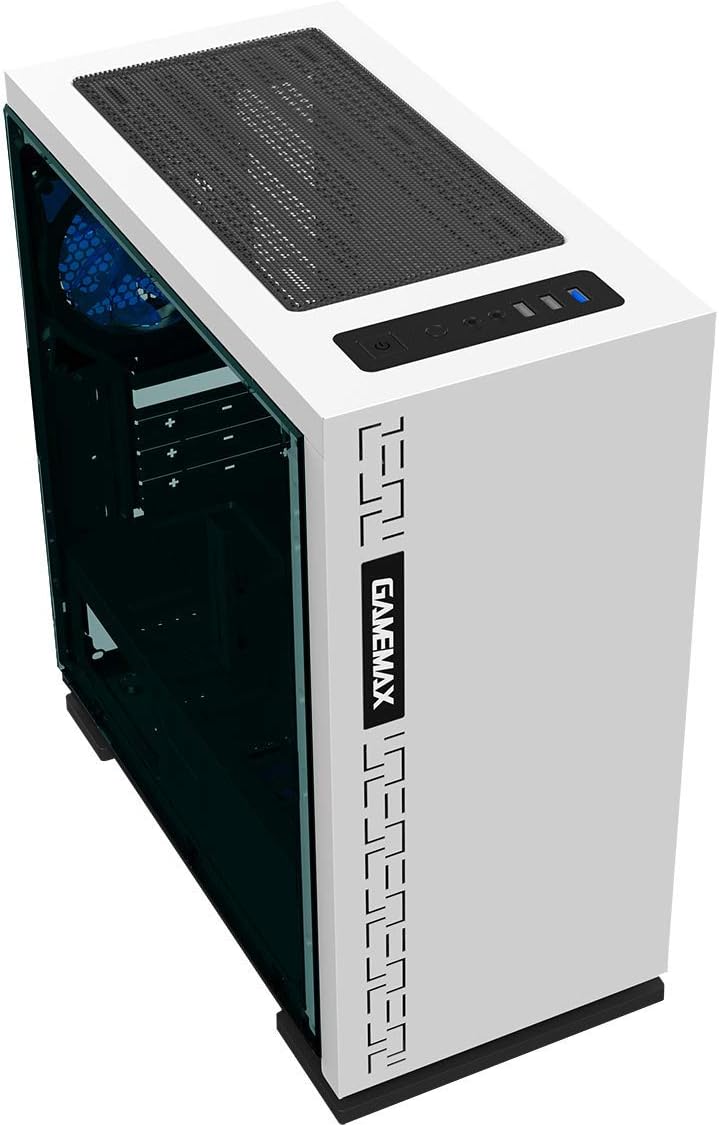
図5.4:背面 view displaying expansion slots and the pre-installed 120mm fan.
5.2 内部レイアウト

図5.5:内部 view with the side panel removed, showing the motherboard tray and cable routing options.

Figure 5.6: Illustration of fan and radiator mounting points within the chassis.
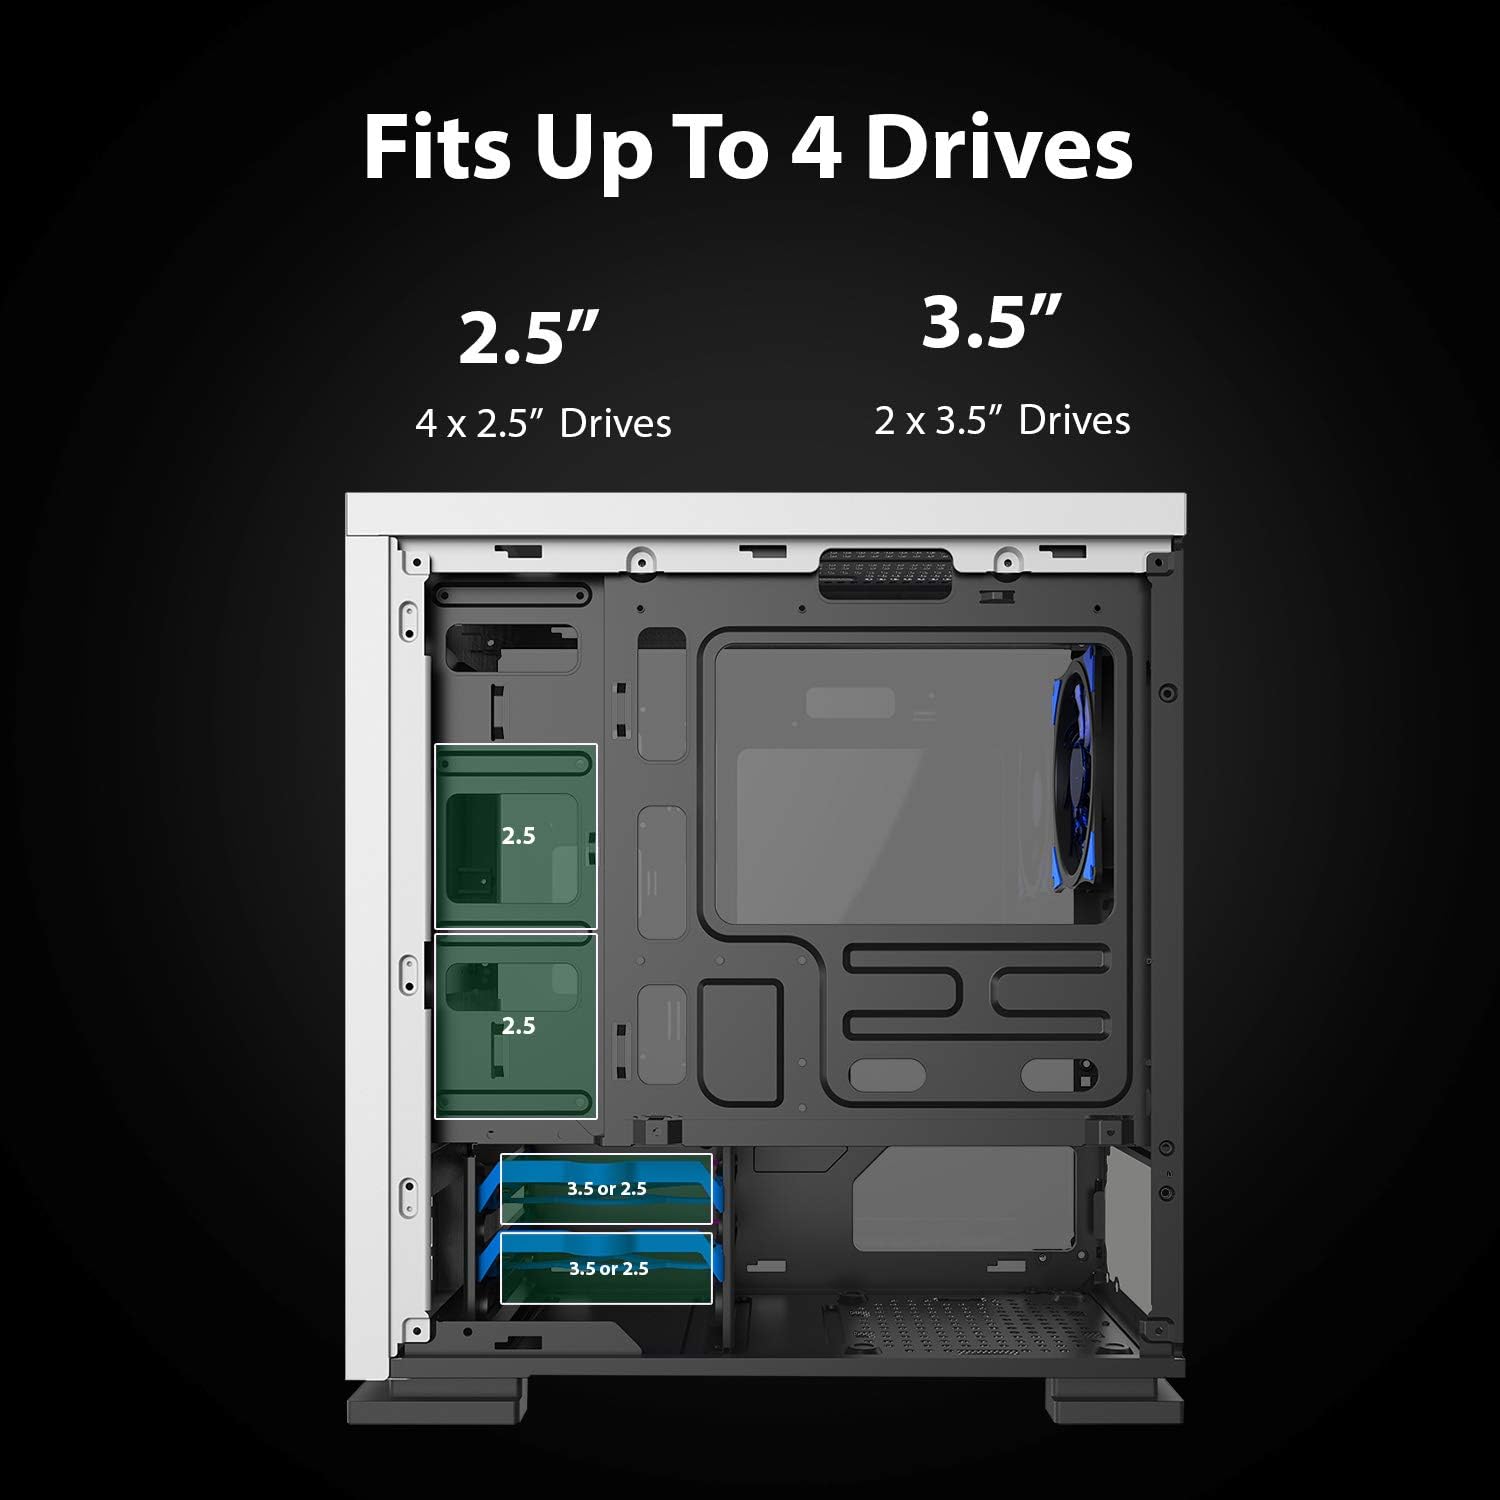
Figure 5.7: Drive bay locations supporting 2.5" and 3.5" storage devices.
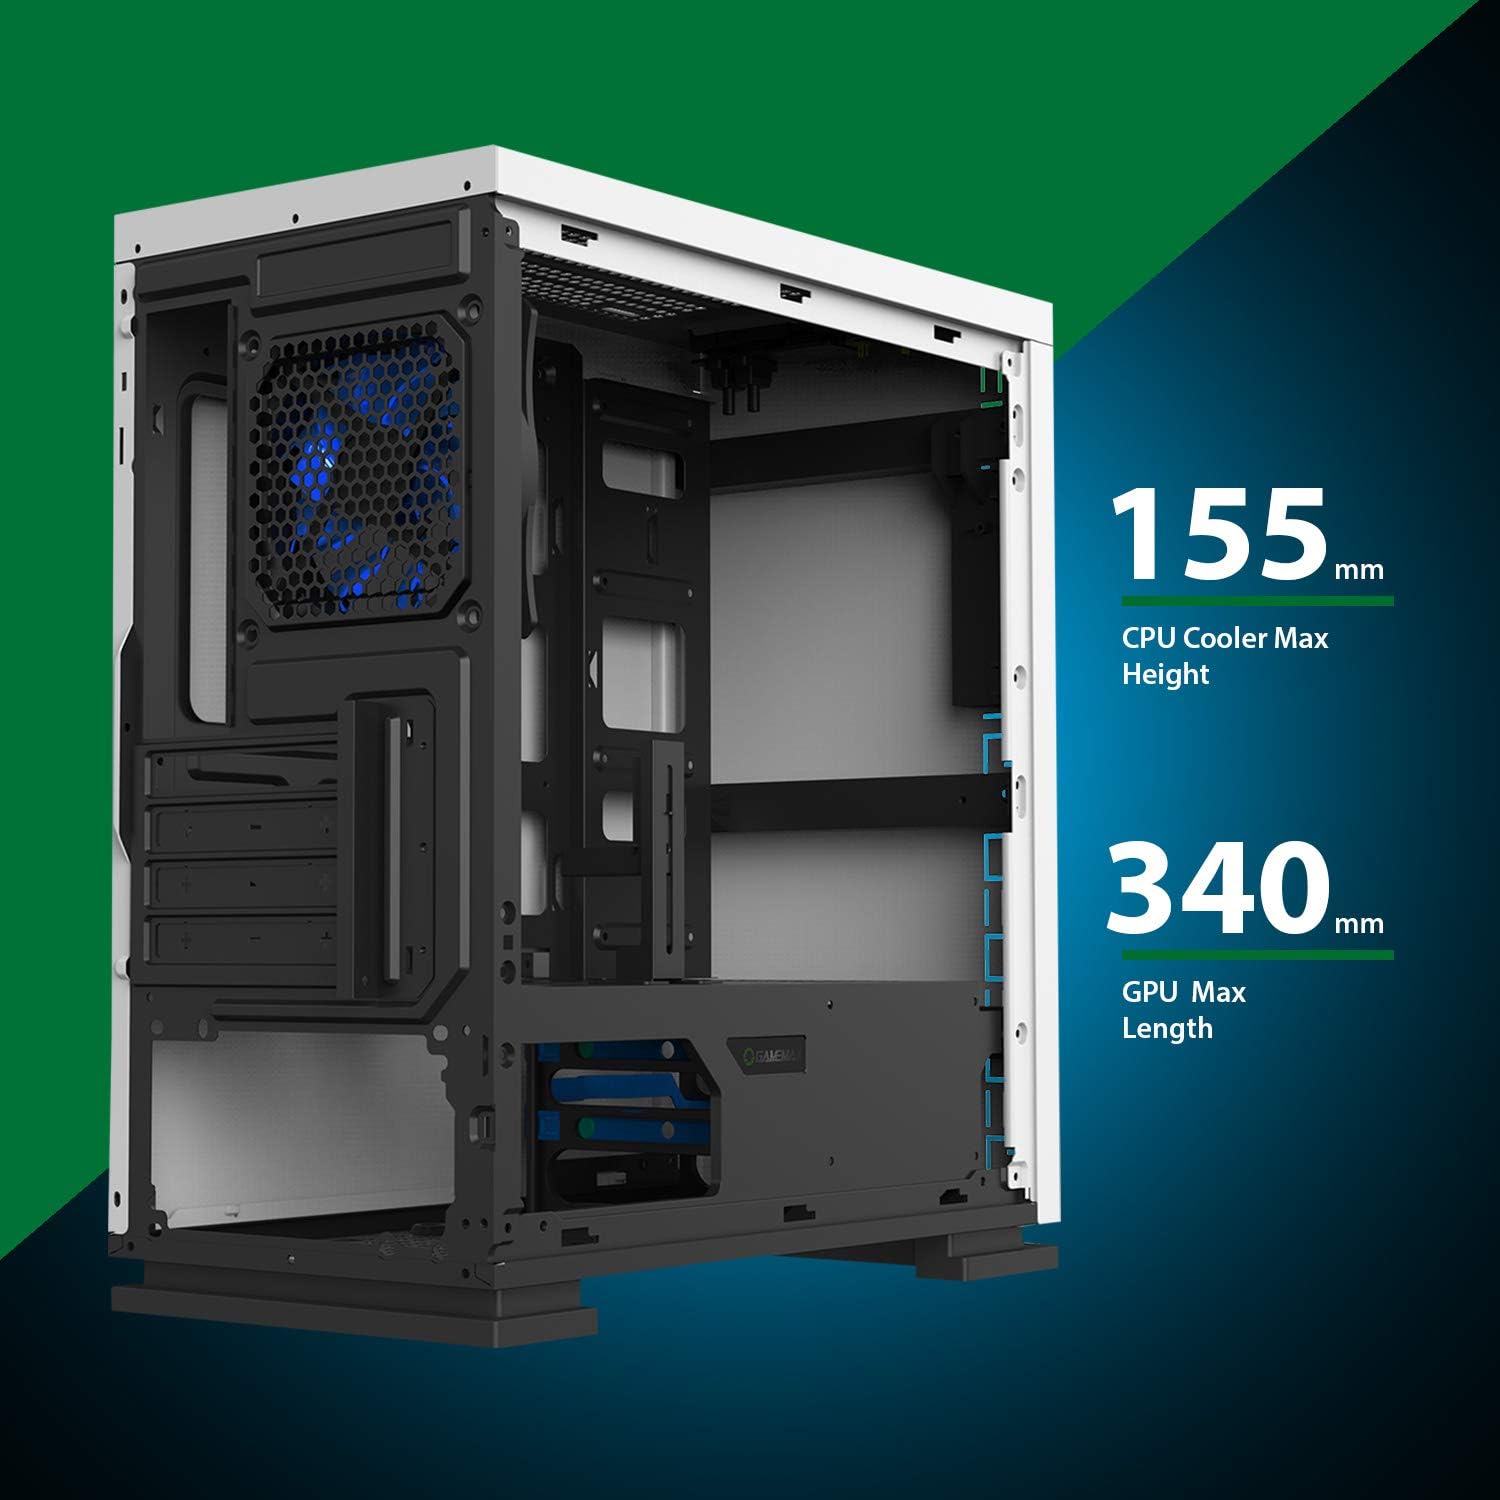
Figure 5.8: Maximum clearance for CPU coolers (155mm) and GPUs (340mm).
6. セットアップとインストール
6.1 準備
- Unpack the chassis and remove all packaging materials.
- 背面のつまみネジを緩めて、サイドパネルを取り外します。
- Gather necessary tools: Phillips head screwdriver, cable ties.
6.2マザーボードの取り付け
- I/O シールドをシャーシの背面開口部に取り付けます。
- Align the motherboard with the pre-installed standoffs. Ensure the standoffs match your Micro ATX motherboard's mounting holes.
- 付属のネジでマザーボードを固定します。
6.3 電源の設置
- Place the power supply unit (PSU) into the dedicated compartment at the bottom rear of the case.
- PSU をシャーシ背面のネジ穴に合わせます。
- 付属のネジでPSUを固定します。
6.4 ストレージドライブのインストール
- 2.5インチドライブ: Mount 2.5" SSDs/HDDs to the dedicated mounting points on the motherboard tray or within the drive cage using the provided screws.
- 3.5インチドライブ: 3.5インチHDDをPSUシュラウドの下にあるドライブケージに取り付けます。ドライブをトレイに差し込み、固定します。
6.5 Expansion Card (GPU) Installation
- シャーシの背面から必要な拡張スロット カバーを取り外します。
- グラフィック カードまたはその他の拡張カードをマザーボード上の適切な PCIe スロットに挿入します。
- カードをネジで固定します。
- Utilize the adjustable GPU bracket to provide additional support for heavier graphics cards.
6.6 ファンと冷却装置の設置
- The case comes with one 120mm Blue LED fan pre-installed at the rear.
- Additional 120mm fans can be installed at the top and front positions as needed.
- Ensure fans are oriented correctly for optimal airflow (intake or exhaust).
6.7 Front Panel Connector Installation
Connect the front panel cables (USB 3.0, USB 2.0, HD Audio, Power SW, Reset SW, Power LED, HDD LED) to their corresponding headers on your motherboard. Refer to your motherboard manual for exact pin layouts.
7.運用
Once all components are installed and cables are connected, replace the side panels. Connect your monitor, keyboard, mouse, and power cable. Press the power button on the top panel to start your system. The pre-installed LED fan will illuminate upon power-on.
8. メンテナンス
- ダストフィルターのクリーニング: Regularly remove and clean the magnetic dust filter located on the top panel to maintain optimal airflow and prevent dust buildup inside the case.
- 一般的な清掃: 柔らかくてamp cloth to clean the exterior surfaces of the case. Avoid abrasive cleaners.
- 内部のほこり除去: Periodically use compressed air to clear dust from internal components and fans. Ensure the system is powered off and unplugged before performing internal cleaning.
9。 トラブルシューティング
- システムが電源オンにならない: Check all power connections, including the PSU to the wall outlet, PSU to motherboard, and front panel power switch cable to the motherboard.
- ファンが回転しない: Verify fan cables are securely connected to the motherboard or fan controller.
- USB ポートが機能しない: フロントパネルの USB ケーブルがマザーボードの USB ヘッダーに正しく接続されていることを確認します。
- ディスプレイ出力なし: Confirm the graphics card is properly seated and connected to power, and the monitor cable is connected to the graphics card, not the motherboard's integrated graphics port (unless using integrated graphics).
10. 仕様
| 特徴 | 仕様 |
|---|---|
| モデル名 | GMX EXPEDITION |
| ブランド | ゲームマックス |
| ケースタイプ | Micro Tower (MATX) |
| マザーボードの互換性 | マイクロATX |
| 色 | Expedition White |
| 材料 | ポリカーボネート(PC) |
| 製品寸法(長さx幅x高さ) | 14.96 x 7.4 x 13.78 インチ (380 x 188 x 350 mm) |
| アイテム重量 | 8.58ポンド(3.9kg) |
| USB 3.0 ポート | 1 |
| USB 2.0 ポート | 2 |
| 冷却方法 | 空気、水 |
| 付属ファン | 1 x 120mm Blue LED (Rear) |
| CPUクーラーの最大高さ | 155mm |
| GPUの最大長 | 340mm |
11. 保証とサポート
For warranty information and technical support, please visit the official GameMax webサイトをご覧いただくか、お近くの販売店にお問い合わせください。
正式 Webサイト: gamemaxpc.com