
1.製品オーバーview
The LaiPuDuo 11-Key RF Mini Wireless Remote LED Controller is designed for controlling single-color LED strip lights operating on DC5-24V. This compact and lightweight controller utilizes 433MHz radio frequency (RF) signals, allowing for control without direct line-of-sight. It features 8 dynamic modes, 10-level speed adjustment, and 10-level static brightness adjustment, making it a versatile solution for various lighting applications.
含まれるもの
- LEDコントローラ
- リモートコントロール
2. 特徴
- 出力電流: <6A (each circuit), DC5-24V.
- ワイヤレス制御: 11-button RF wireless remote control operating at 433MHz.
- メモリ機能: Features automatic shutdown memory, retaining the last setting.
- 多用途アプリケーション: Compatible with various LED lights including LED source, LED strips (3528, 5050, COB), wall washer lights, and glass curtain wall lights.
- ダイナミックモード: Includes 8 kinds of monochrome dynamic models (e.g., flash blasting, breathing, strobe, flicker).
- 速度調整: 10 levels of dynamic speed adjustment.
- 明るさ調整: Single-channel static 10-level brightness adjustment.
- 使いやすさ: Compact, lightweight, intuitive button design, easy to wire and operate.
- リモートレンジ: Offers control from a long distance, with signal penetration through walls and doors.
3. 仕様
| 仕様 | 価値 |
|---|---|
| 製品寸法 | 4.96 x 3.31 x 0.39インチ |
| アイテム重量 | 1.23オンス |
| 商品型番 | 11key RF Mini |
| ブランド | LaiPuDuo |
| 特集 | リモートコントロール |
| 色 | ホワイト/ブラック |
| サポートされるデバイスの最大数 | 1 |
| 対応デバイス | LEDXNUMXamps, LED strips (3528, 5050, COB) |
| メーカー | Shenzhen LPD Co.,Ltd |
4. セットアップ手順
4.1 コントローラの接続
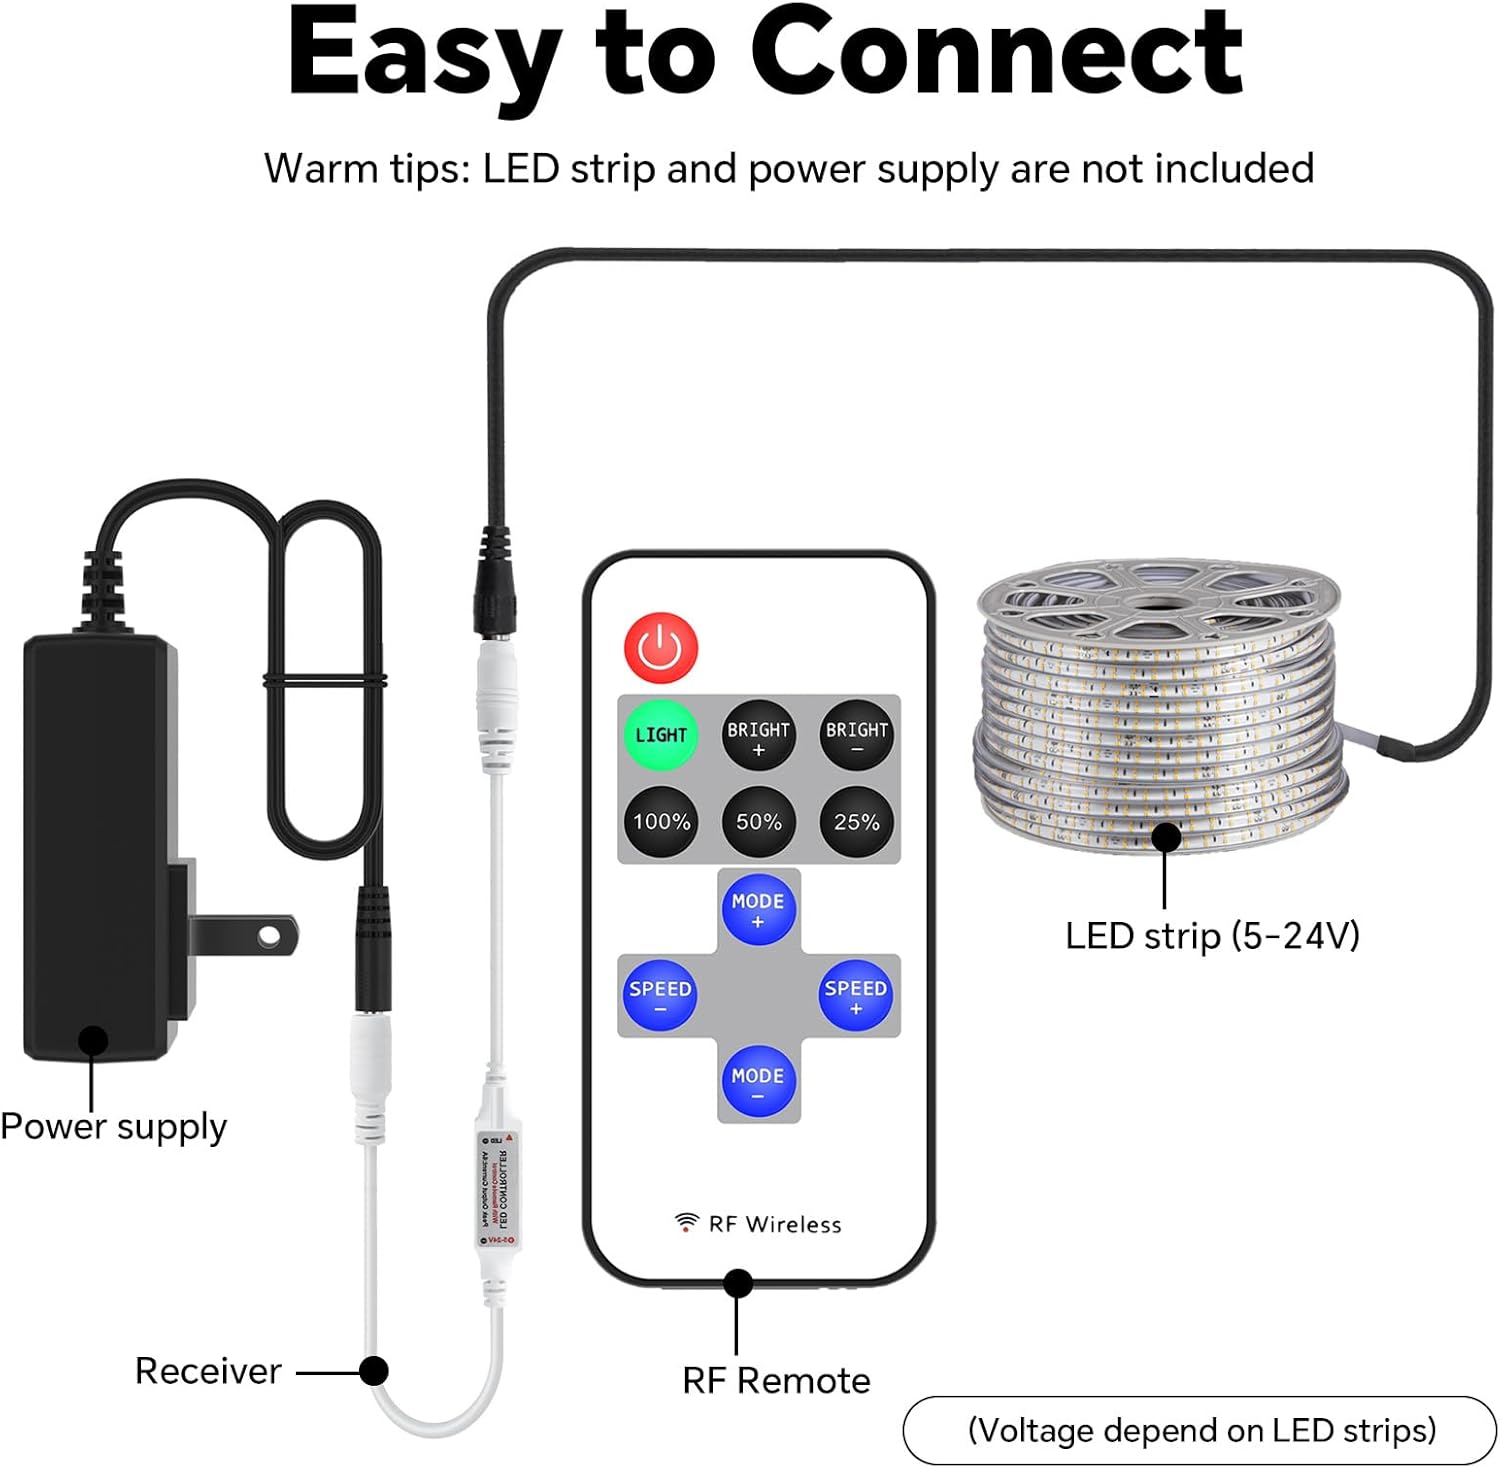
Follow these steps to connect your LED controller system. Ensure all components are compatible with DC5-24V power. The LED strip and power supply are not included with this controller.
- Connect your DC5-24V power supply to the input side of the LED controller receiver.
- Connect your single-color LED strip light to the output side of the LED controller receiver.
- 電源を投入する前に、すべての接続が安全であることを確認してください。
4.2リモコンのペアリング
The remote control is typically pre-paired with the receiver. If re-pairing is necessary or if the remote is unresponsive, follow the instructions in the video below.
5. 操作手順
5.1リモコン機能
The 11-key RF Mini Remote provides intuitive control over your LED strip lights. Refer to the diagram below for button identification and their respective functions.

- 電源ボタン(赤): Turns the LED lights On or Off.
- LIGHT Button (Green): Activates the static lighting function.
- BRIGHT + / BRIGHT - Buttons: Adjusts the brightness level of the static light.
- 100% / 50% / 25% ボタン: Sets the static brightness to predefined levels.
- MODE + / MODE - Buttons: Cycles through the 8 dynamic lighting modes.
- SPEED + / SPEED - Buttons: Adjusts the speed of the active dynamic lighting mode (10 levels).
5.2 明るさ調整
You can precisely control the brightness of your LED lights using the dedicated brightness buttons or the '+' and '-' controls. The remote offers 10 levels of brightness adjustment for static light.

5.3 Dynamic Modes and Speed
The controller features 8 distinct dynamic modes, such as flashing, breathing, and strobing effects. Use the 'MODE +' and 'MODE -' buttons to switch between these modes. The 'SPEED +' and 'SPEED -' buttons allow you to adjust the speed of the selected dynamic mode across 10 different levels.

6. メンテナンス
6.1 電池の交換
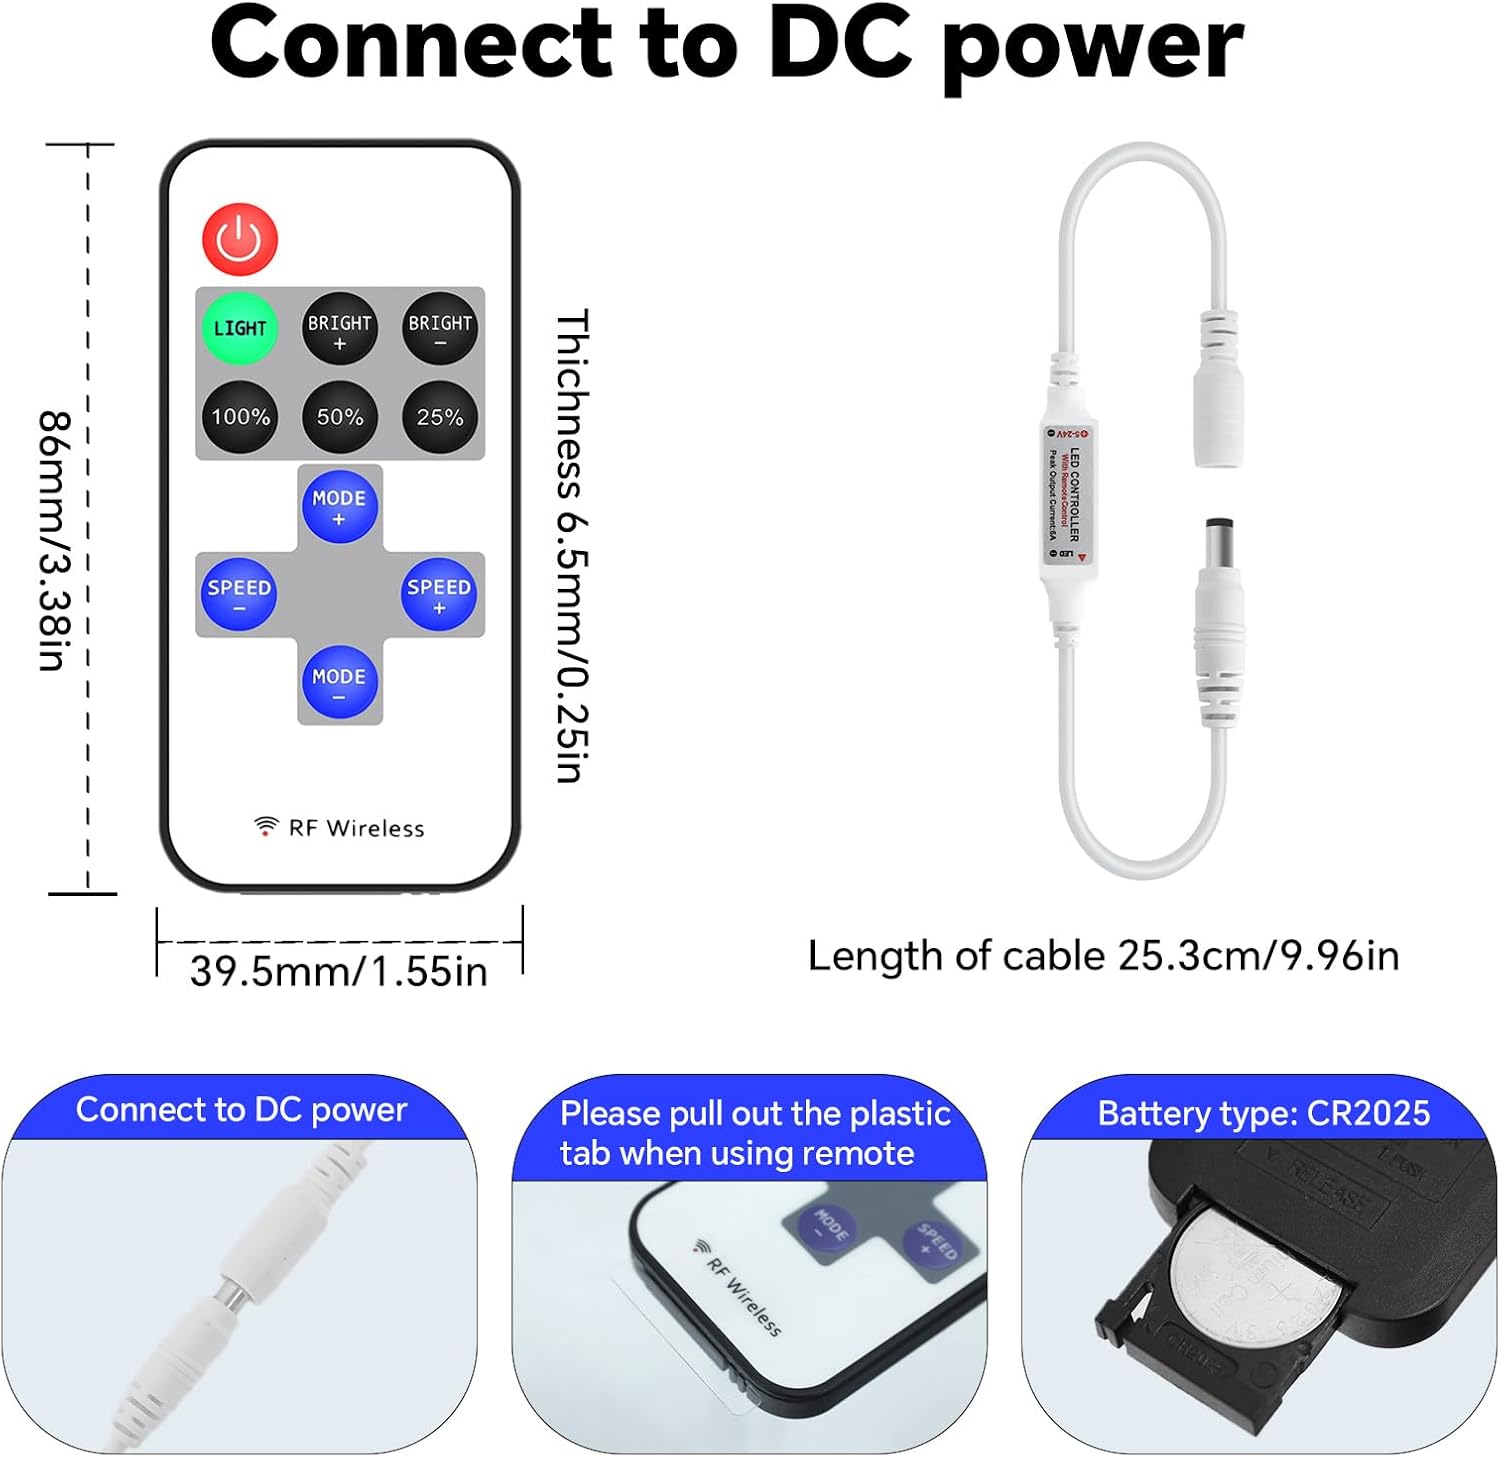
The remote control is powered by a CR2025 coin cell battery. If the remote's range decreases or it becomes unresponsive, the battery may need replacement.
- リモコンの背面にある電池収納部を見つけます。
- Slide open the battery tray or use a small tool to gently pry it open.
- 古い CR2025 電池を取り外します。
- 新しい CR2025 電池をプラス (+) 側を上に向けて挿入します。
- 電池ケースをしっかりと閉めてください。
7。 トラブルシューティング
- ライトが反応しない: Check if the remote control battery needs replacement. Ensure the plastic tab has been removed from the battery compartment. Verify all power and LED strip connections are secure.
- 間欠制御: Ensure the remote is within effective range. While RF technology allows for signal penetration, extreme distances or dense obstacles may affect performance.
- ライトが点灯しない: Confirm the power supply is functioning correctly and providing the appropriate voltage (DC5-24V). Check the LED strip for any damage.
- ライトの動作が正しくありません: If the lights are not behaving as expected, try re-pairing the remote control as shown in the setup video.
8.重要な情報
8.1安全ガイドライン
- Do not expose the controller or remote to moisture or extreme temperatures.
- 電源のボリュームを確認してくださいtage matches the controller's requirements (DC5-24V).
- Avoid short-circuiting the connections.
- お子様の手の届かない場所に保管してください。
- 電池は地域の規制に従って責任を持って廃棄してください。
8.2 保証とサポート
For warranty information, technical support, or further assistance, please refer to the product packaging or contact the manufacturer directly through their official webサイトまたはカスタマー サービス チャネル。