
1. はじめに
This manual provides essential information for the installation, operation, and maintenance of your Western Digital 1TB 3.5" SATA HDD (Model WD10EZEX). This internal hard drive is designed for desktop PC and Mac systems, offering reliable storage and performance for various applications.

図1:上 view of the Western Digital 1TB 3.5" SATA Hard Drive.
2. 安全情報
Observe the following safety guidelines to prevent damage to the drive or personal injury:
- 回路基板やコネクタに触れないように、ハードドライブは常に端を持って取り扱ってください。
- Ensure proper grounding to prevent electrostatic discharge (ESD) when handling the drive. Use an anti-static wrist strap.
- Disconnect power from your computer before installing or removing the hard drive.
- ドライブを極端な温度、湿度、または直射日光にさらさないでください。
- Do not drop or subject the drive to physical shock.
3. パッケージ内容
パッケージには次のアイテムが含まれています。
- Western Digital 1TB 3.5" SATA HDD (Model WD10EZEX)
Note: SATA data cables, power cables, and mounting screws are typically sold separately and are not included with this OEM drive.
4. セットアップ
4.1. インストール前のチェックリスト
- A desktop computer with an available 3.5-inch drive bay.
- A SATA data cable.
- An available SATA power connector from your power supply.
- Mounting screws (typically M3 or 6-32 UNC).
- プラスドライバー。
- 静電気防止リストストラップ(推奨)。
4.2. 物理的な設置
- 電源を切る: コンピュータをシャットダウンし、電源コードを壁のコンセントから抜きます。
- ケースを開く: 内部コンポーネントにアクセスするには、コンピューター ケースのサイド パネルを取り外します。
- ドライブベイを見つけます: Identify an available 3.5-inch drive bay. Some cases may require a drive caddy.
- マウントドライブ: Slide the hard drive into the drive bay or caddy. Secure it with mounting screws on both sides.
- ケーブルを接続する:
- Connect one end of the SATA data cable to the smaller port on the hard drive and the other end to an available SATA port on your motherboard.
- Connect a SATA power cable from your power supply to the larger port on the hard drive.
- ケースを閉じる: Replace the computer case side panel(s) and reconnect the power cord.

図2:下 view of the hard drive, showing the SATA data and power connectors.
4.3. Initial Software Setup (Windows/macOS)
After physical installation, the drive needs to be initialized and formatted by your operating system:
- 電源オン: コンピュータを起動します。
- ディスク管理にアクセスします (Windows): Right-click on the Start button, select "Disk Management".
- ディスクの初期化: Locate your new WD10EZEX drive (it may appear as "Unallocated Space"). Right-click on it and select "Initialize Disk". Choose MBR (Master Boot Record) for drives up to 2TB or GPT (GUID Partition Table) for drives larger than 2TB (though this 1TB drive can use either, GPT is more modern).
- 新しいシンプルボリュームの作成: Right-click on the unallocated space, select "New Simple Volume". Follow the wizard to assign a drive letter and format the drive (NTFS for Windows).
- macOSの場合: Open "Disk Utility", select the new drive, and use the "Erase" function to format it (e.g., APFS or Mac OS Extended).
For migrating an existing operating system to this new drive, Western Digital offers Acronis True Image Edition software for free download. This software enables you to copy all your data, including the operating system, to the new drive without reinstalling.
5. ハードドライブの操作
Once installed and formatted, your WD10EZEX drive will function as a standard storage device. You can use it for:
- Storing documents, photos, videos, and other personal files.
- Installing applications and games.
- Creating backups of your primary drive.
The 7200 RPM rotational speed and SATA 6Gb/s interface ensure efficient data transfer and responsive performance for everyday computing tasks.
6. メンテナンス
To ensure the longevity and optimal performance of your hard drive, consider the following maintenance tips:
- 定期的なバックアップ: Periodically back up important data to another storage device or cloud service.
- Disk Defragmentation (HDD only): For Windows users, run Disk Defragmenter occasionally to optimize file arrangement. SSDs do not require defragmentation.
- 健康状態を監視する: Use disk utility software (e.g., CrystalDiskInfo, WD Drive Utilities) to monitor the drive's S.M.A.R.T. (Self-Monitoring, Analysis and Reporting Technology) status for early detection of potential issues.
- 涼しく保つ: 過熱を防ぐために、コンピューターケース内の適切な空気の流れを確保してください。
- 物理的な衝撃を避けてください: Hard drives are mechanical devices; avoid moving the computer while it is operating or subjecting it to sudden impacts.
7。 トラブルシューティング
7.1. ドライブが検出されない
- すべての SATA データおよび電源ケーブルの接続をチェックして、安全であることを確認します。
- Verify that the drive is properly seated in its bay.
- Check your computer's BIOS/UEFI settings to ensure the SATA port is enabled and the drive is recognized.
- Ensure the drive has been initialized and formatted in Disk Management (Windows) or Disk Utility (macOS).
7.2. パフォーマンスの低下
- Ensure your SATA data cable is connected to a SATA 6Gb/s port on your motherboard for optimal speed.
- ディスク リソースを消費しているバックグラウンド プロセスを確認します。
- Run disk defragmentation (Windows) if the drive is heavily fragmented.
- Verify the drive's health using S.M.A.R.T. monitoring tools.
7.3. 異常な音
- Clicking, grinding, or repetitive noises can indicate a failing drive. Back up your data immediately and consider replacing the drive.
- A slight hum or whirring sound is normal for mechanical hard drives.
8. 仕様
| 特徴 | 説明 |
|---|---|
| モデル番号 | WD10EEX |
| 容量 | 1TB |
| インタフェース | SATA 6Gb/秒 |
| フォームファクター | 3.5インチ |
| 回転速度 | 7200 回転 |
| キャッシュ | 64MB |
| 寸法(長さx幅x高さ) | 5.69 x 3.92 x 0.89インチ |
| アイテム重量 | 15.9オンス |
| ハードウェアプラットフォーム | PC |
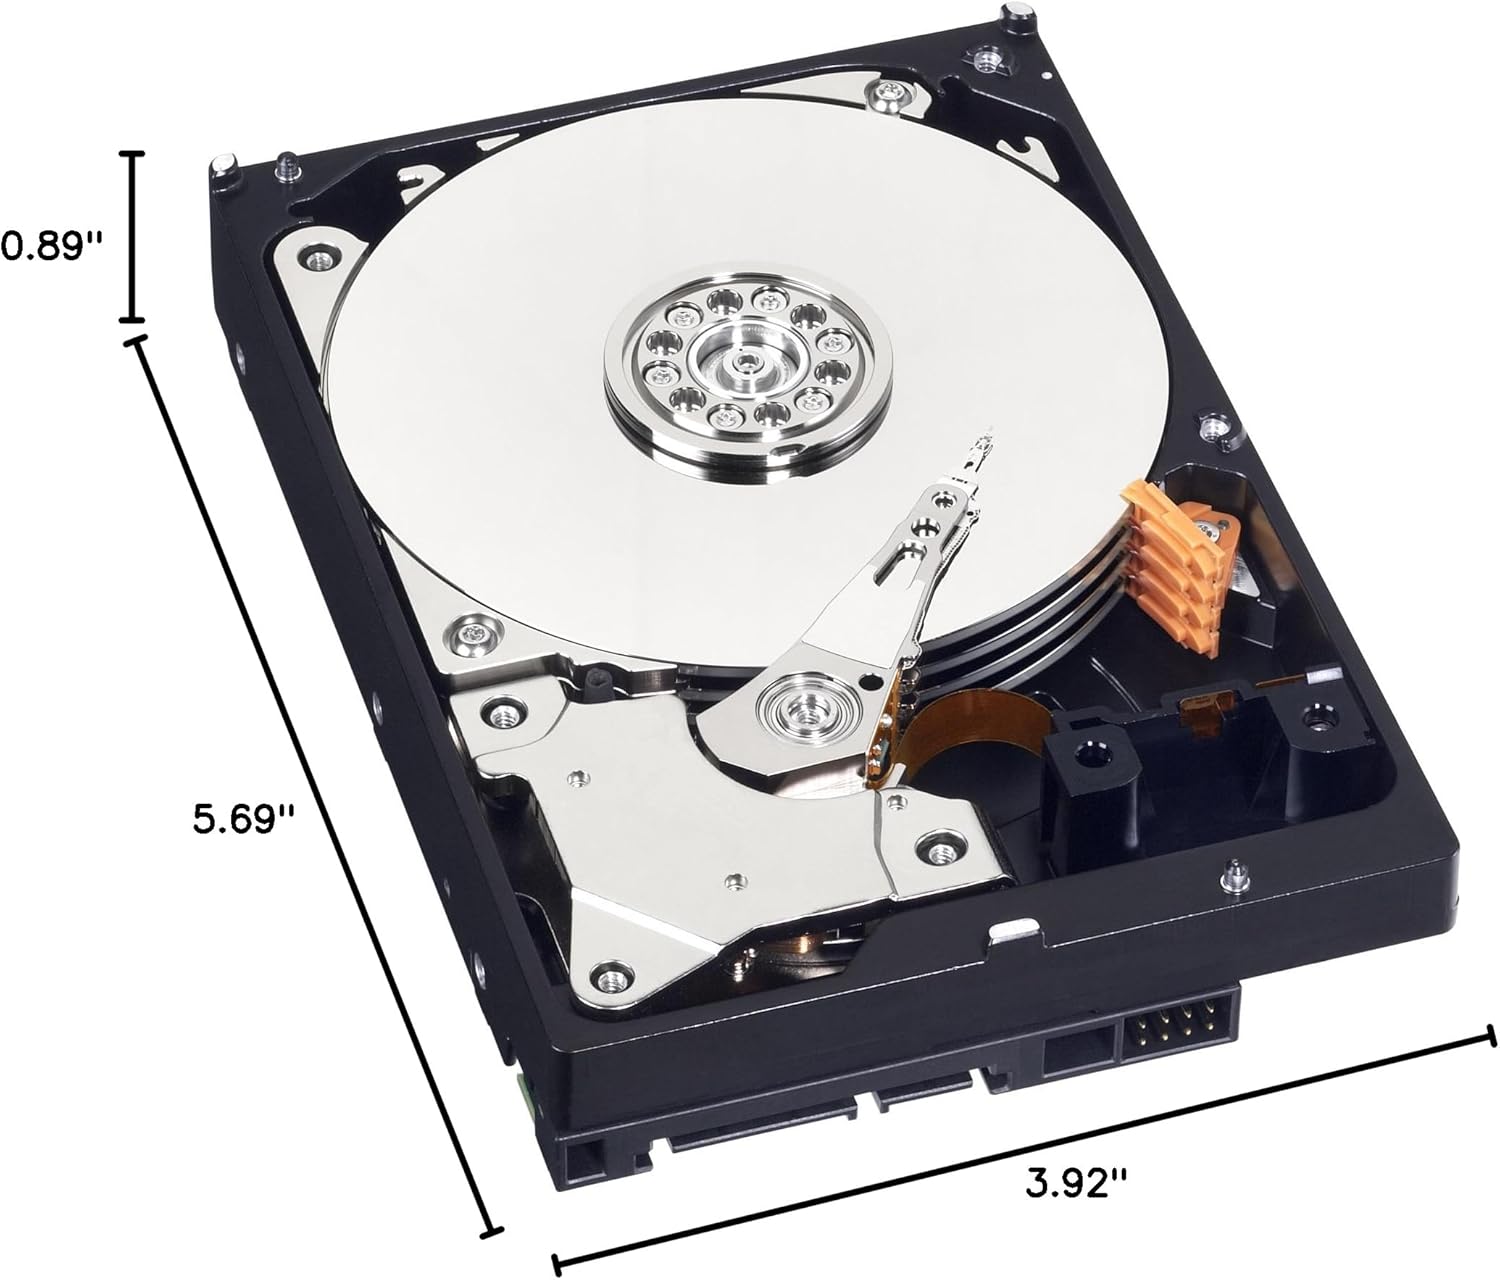
Figure 3: Dimensions of the Western Digital 1TB 3.5" SATA Hard Drive.
9. 保証とサポート
For warranty information and technical support, please refer to the official Western Digital web購入サイトをご覧いただくか、カスタマーサービスまでお問い合わせください。保証請求のために購入証明書を保管してください。