
1. 重要な安全上の注意事項
Please read all instructions carefully before using this projector. Keep this manual for future reference.
- 通気口を塞がないでください。プロジェクター周囲に十分な空気の流れを確保してください。
- 火災や感電を防ぐため、プロジェクターを雨や湿気にさらさないでください。
- プロジェクターのレンズを直視しないでください。amp 明るい光により目が損傷する恐れがあるため、電源をオンにしてください。
- プロジェクターに付属の電源アダプターのみを使用してください。
- プロジェクターが落下しないように、安定した水平な場所に置いてください。
- プロジェクターをご自身で分解したり、修理したりしないでください。修理はすべて資格のある専門家にご依頼ください。
2.製品オーバーview
2.1 プロジェクターのコンポーネント
Familiarize yourself with the various parts of your UNIC UC36 projector.
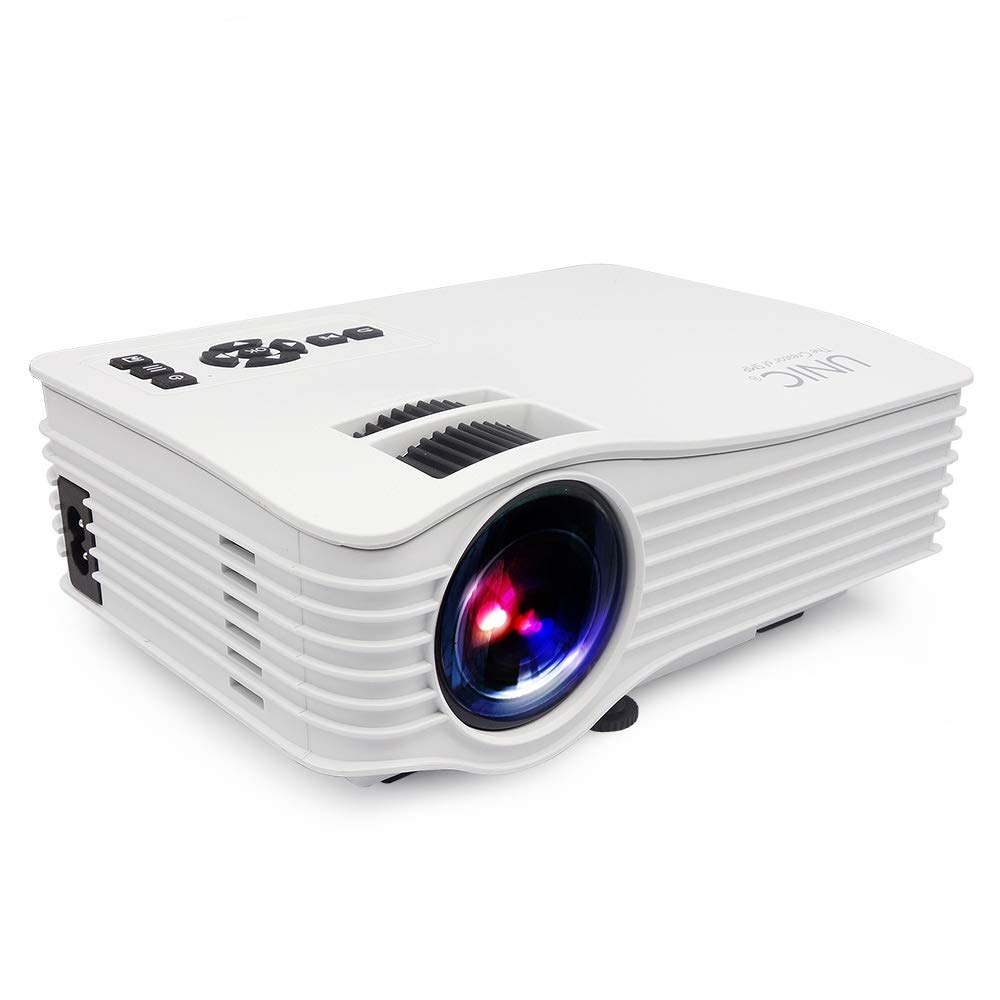
画像: フロント view of the UNIC UC36 Mini LED Portable Projector, showing the lens and overall compact design.
トップパネルコントロール

画像: トップ view of the UNIC UC36 projector, highlighting the control panel. This includes buttons for Menu, Signal Source, Power On/Off, directional navigation (Up/Down/Left/Right/OK), Exit/Return, and Play/Pause. Below the control panel are the Focus and Keystone adjustment wheels.
接続ポート

画像: 側 view of the UNIC UC36 projector, detailing the input/output ports. From left to right, these include a 3.5mm earphone jack, AV input, HDMI port, USB port, 5V USB power output, SD card slot, and IR receiver.
フォーカスと台形補正の調整

画像: クローズアップ側 view of the UNIC UC36 projector, showing the two adjustment wheels for focus and keystone correction, located near the lens.
接続図

画像: Diagram illustrating various devices that can be connected to the UNIC UC36 projector, including U disk, TV Box, Camera, Computer, HD Player, PS4, Laptop, and DVD player, demonstrating its versatile input options.
3. セットアップ
3.1電源接続
- 電源ケーブルをプロジェクターの電源入力ポートに接続します。
- 電源ケーブルのもう一方の端を標準電源コンセント (100 ~ 240 V、50/60 Hz) に差し込みます。
3.2 入力ソースの接続
The UC36 projector supports multiple input sources:
- HDMI: Connect an HDMI cable from your device (e.g., laptop, gaming console, Blu-ray player) to the projector's HDMI port.
- USB: メディアを直接再生するには、USB フラッシュ ドライブを USB ポートに挿入します。
- AV: Use the provided AV cable to connect to devices with AV output (e.g., older DVD players, set-top boxes).
- SDカード: メディアを直接再生するには、SD カードを SD カード スロットに挿入します。
- オーディオ出力: 外部スピーカーまたはヘッドフォンを 3.5mm イヤホン ジャックに接続して、オーディオを強化します。
3.3 プロジェクターの配置
Place the projector on a stable, flat surface. Ensure the projection distance is between 1.07m and 3.8m to achieve a screen size of 34 to 130 inches.
3.4 フォーカスとキーストーン調整
- 集中: Rotate the focus wheel (the larger wheel) until the projected image is clear and sharp.
- キーストーン: If the projected image appears trapezoidal (wider at the top or bottom), rotate the keystone correction wheel (the smaller wheel) to adjust the image geometry until it is rectangular.
4. 操作手順
4.1 電源のオン/オフ
- 電源オン: Press the 'On/Off' button on the top panel or the remote control. The indicator light will turn on.
- 電源を切る: Press the 'On/Off' button again. Allow the projector to cool down before unplugging it.
4.2 ソースの選択
After powering on, press the 'Signal Source' button on the top panel or the remote control to cycle through available input sources (HDMI, USB, AV, SD). Select the desired input source.
4.3メニューナビゲーション
Press the 'Menu' button to access the projector's settings. Use the directional arrows (Up/Down/Left/Right) to navigate through options and 'OK' to confirm selections. Press 'Exit/Return' to go back or exit the menu.
4.4 メディア再生(USB/SD)
When a USB drive or SD card is inserted and selected as the source, the projector will display a file browser. Navigate to your desired media file (videos, photos, music, text) and press 'OK' to play. Use 'Play/Pause' for media control.
5. メンテナンス
5.1 レンズのクリーニング
Use a soft, lint-free cloth or lens cleaning paper to gently wipe the projector lens. Do not use abrasive cleaners or excessive force, as this can scratch the lens.
5.2 プロジェクター本体のクリーニング
プロジェクターの外側は、柔らかく乾いた布で拭いてください。頑固な汚れには、軽く湿らせた布で拭いてください。amp 布で拭いた後、乾いた布で拭いてください。化学洗剤の使用は避けてください。
5.3リットルamp 人生
LED lamp in your UC36 projector has an estimated life of 20,000 hours (minimum). This means the lamp is designed to last for a significant period under normal usage conditions and typically does not require replacement.
6。 トラブルシューティング
- 画像無し:
- プロジェクターの電源がオンになっており、電源ケーブルがしっかりと接続されていることを確認します。
- 正しい入力ソースが選択されていることを確認します。
- Check the connection cable (HDMI, AV) between the projector and the source device.
- ぼやけた画像:
- 画像が鮮明になるまでフォーカスホイールを調整します。
- 投影距離が推奨範囲(1.07m~3.8m)内であることを確認してください。
- 画像は台形です:
- Adjust the keystone correction wheel to square the image.
- 音が出ない:
- プロジェクターとソースデバイスの両方の音量設定を確認してください。
- Ensure external speakers or headphones are properly connected to the 3.5mm earphone jack if used.
- HDMI を使用する場合は、ソース デバイスが HDMI 経由でオーディオを送信していることを確認します。
7. 仕様
| モデル | UC36 |
| 画像システム | 液晶 |
| Lamp | 導かれた |
| 輝度 | 150ルーメン(150 ANSIルーメン) |
| コントラスト比 | 500:1 |
| ネイティブ解像度 | 640x480p |
| 最大対応解像度 | 1920x1080p (Full HD via HDMI) |
| 入力ポート | AV, USB, SD, HDMI, IR |
| 出力ポート | 3.5mm Earphone, 5V USB Power |
| Lamp 人生 | 20,000時間(最低) |
| Projecting Distance | 1.07m - 3.8m (3.5 feet - 3.8 meters) |
| Projecting Size | 34~130インチ |
| アスペクト比 | 4:3 / 16:9 |
| 電源 | 100-240V、50/60Hz |
| 消費電力 | 50W(最大) |
| 正味重量 | 0.85キロ |
| 寸法 | 190 x 132 x 69 ミリメートル |
8. 保証とサポート
8.1 保証情報
This UNIC UC36 projector comes with a 1-year complete warranty ご購入日から1年間有効です。保証請求の際は、購入証明書を保管してください。保証は、製造上の欠陥および通常の使用における故障を対象としています。
8.2 カスタマーサポート
For technical assistance, troubleshooting, or warranty inquiries, please contact UNIC customer support. Refer to the contact information provided with your purchase documentation or visit the official UNIC webサイト。