
1. はじめに
This manual provides essential information for the safe and efficient installation, operation, and maintenance of your AstralPool Marlin 45 III Countercurrent Swimming Equipment. Please read this manual thoroughly before attempting to install or operate the equipment. Retain this manual for future reference.
2. 安全に関する注意事項
警告: これらの指示に従わなかった場合、重傷または死亡事故につながる可能性があります。
- Always disconnect power to the equipment before performing any service or maintenance.
- 設置は、すべての地方および国の電気および配管規則に従って、資格のある電気技師および配管工が行う必要があります。
- Ensure the electrical supply matches the equipment's specifications (400 V III 50 Hz).
- Keep children away from the equipment during operation and maintenance.
- Do not operate the equipment if any part is damaged or malfunctioning.
- Never block the water inlet or outlet during operation.
- すべての電気部品が適切に接地されていることを確認してください。
3.製品オーバーview
The AstralPool Marlin 45 III is a countercurrent swimming system designed to create a powerful water flow in your pool, allowing for stationary swimming and aquatic exercise. The system consists of a nozzle, a plastic housing, a control panel, and a robust 3.3 kW (4.5 CV) three-phase pump.
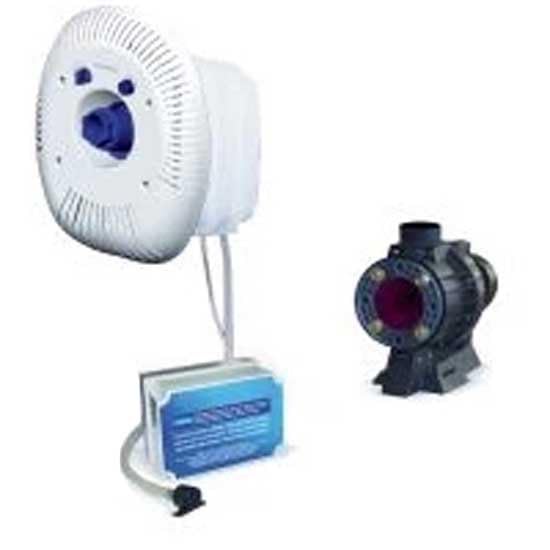
This image displays the main components of the AstralPool Marlin 45 III countercurrent swimming equipment. On the left is the white, circular nozzle unit, which is installed in the pool wall. To its right is the black pump motor assembly, responsible for generating the water flow.
コンポーネント:
- ノズル: The adjustable outlet unit installed in the pool wall, directing the water flow.
- プラスチックハウジング: Protects internal components and provides structural support for the nozzle unit.
- コントロールパネル: Allows users to activate and deactivate the countercurrent system.
- Pump (3.3 kW / 4.5 CV, 400 V III 50 Hz): The powerful motor responsible for circulating water and creating the countercurrent.
4. セットアップとインストール
Installation of the AstralPool Marlin 45 III Countercurrent Swimming Equipment requires specialized knowledge and should only be performed by certified professionals. Incorrect installation can lead to equipment damage, electrical hazards, or plumbing issues.
General Installation Steps (for professional guidance):
- サイトの選択: Choose an appropriate location for the pump, ensuring it is protected from weather, well-ventilated, and accessible for maintenance.
- Nozzle Placement: Install the nozzle unit in the pool wall at the recommended depth and location for optimal countercurrent effect.
- 配管接続: Connect the pump to the nozzle unit using appropriate PVC piping and fittings, ensuring all connections are watertight.
- 電気配線: Connect the pump and control panel to the main electrical supply (400 V III 50 Hz) via a dedicated circuit breaker, ensuring proper grounding and compliance with electrical codes.
- 初期プライミング: Before first use, ensure the pump is properly primed according to the pump manufacturer's instructions to prevent dry running.
- システムテスト: After installation, perform a thorough test of the system to check for leaks, proper operation, and electrical safety.
5. 操作手順
Once properly installed and primed, operating the Marlin 45 III is straightforward.
システムの起動:
- Ensure the pool water level is adequate for safe operation.
- Activate the main power switch for the countercurrent system.
- Press the ON button on the control panel, typically located near the pool or on the nozzle unit itself. The pump will start, and water will begin to flow from the nozzle.
Stopping the System:
- Press the OFF button on the control panel. The pump will stop.
- For extended periods of non-use, or during maintenance, turn off the main power switch to the system.
フロー調整:
Some models may feature adjustable nozzle settings to vary the intensity or direction of the countercurrent. Refer to the specific nozzle documentation for adjustment procedures.
6. メンテナンス
Regular maintenance ensures the longevity and optimal performance of your countercurrent system.
定期メンテナンス:
- ノズルの検査: Periodically check the nozzle for any debris or blockages. Clean as necessary.
- ポンプをチェックしてください: Listen for unusual noises from the pump. Ensure there are no visible leaks around the pump or plumbing connections.
- 電気検査: Annually, have a qualified electrician inspect all electrical connections and wiring for wear or corrosion.
- 冬季: In colder climates, the system must be properly winterized to prevent freeze damage. This typically involves draining all water from the pump and plumbing lines and storing the pump in a dry, frost-free location if removable. Consult a pool professional for specific winterization procedures for your setup.
7。 トラブルシューティング
This section addresses common issues you might encounter with your countercurrent system.
| 問題 | 考えられる原因 | 解決 |
|---|---|---|
| System does not start | 電源なし 回路ブレーカーが落ちた コントロールパネルの故障 | Check main power switch and circuit breaker. Ensure connections are secure. If problem persists, contact a qualified electrician. |
| 水流が弱い | Blocked nozzle or inlet ポンプがプライミングされていません システム内の空気 | Inspect and clear any blockages in the nozzle or plumbing. Ensure pump is properly primed. Bleed air from the system if necessary. |
| ポンプが異常な音を立てる | システム内の空気 ベアリングの摩耗 ポンプのインペラ内のゴミ | Check for air leaks in suction line. If noise persists, turn off power and inspect pump impeller for debris. Contact a professional for bearing issues. |
| 水漏れ | 配管接続の緩み シールまたはOリングの損傷 | Tighten all plumbing connections. Inspect and replace any worn or damaged seals/O-rings. |
If you encounter a problem not listed here, or if the suggested solutions do not resolve the issue, please contact a qualified service technician or AstralPool customer support.
8. 仕様
- モデル: Marlin 45 III
- 部品番号: 35377
- ポンプ出力: 3.3 kW (4.5 CV)
- 巻tage: 400ボルト
- 段階: Three-phase (III)
- 頻度: 50Hz
- 商品の重量: 42.2キロ
- メーカー: アストラルプール
- 初回利用可能日: 3年2016月XNUMX日
9. 保証とサポート
For warranty information, please refer to the documentation provided at the time of purchase or contact your authorized AstralPool dealer. Keep your proof of purchase for warranty claims.
For technical support, spare parts, or service, please contact your local AstralPool distributor or the retailer from whom you purchased the equipment. Provide your model number (Marlin 45 III) and serial number (if applicable) when seeking assistance.