
Metra 99-6525HG
Metra 99-6525HG Single/Double DIN Dash Kit for Chrysler 300 (2011-Up)
Model: 99-6525HG | Brand: Metra
導入
This instruction manual provides detailed guidance for the installation and use of the Metra 99-6525HG Single/Double DIN Dash Kit. This kit is specifically designed for 2011 and newer Chrysler 300 vehicles, allowing for the installation of an aftermarket single or double DIN radio. It features high-grade ABS plastic construction with precision tolerances to ensure a factory-matched texture and style.
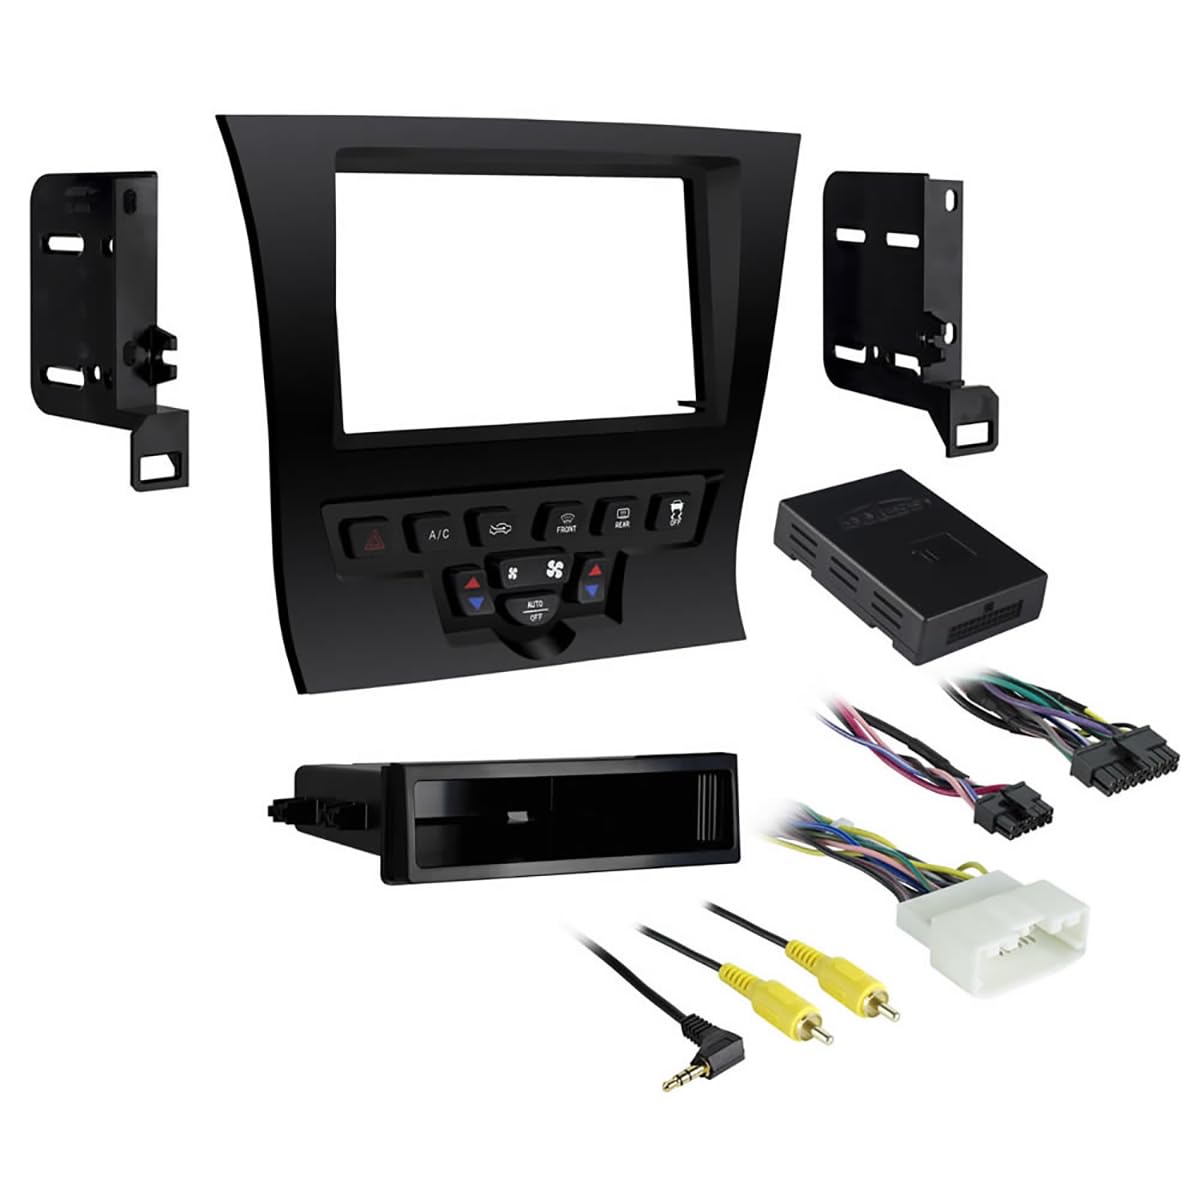
Image: Metra 99-6525HG Single/Double DIN Dash Kit. This image displays the high gloss black dash kit components, including the main bezel and mounting brackets, designed to integrate an aftermarket radio seamlessly into the Chrysler 300 dashboard.
安全情報
Please read all instructions carefully before beginning installation. Improper installation may result in damage to the vehicle, the product, or personal injury. Always disconnect the vehicle's battery before performing any electrical work. Wear appropriate safety gear, including eye protection. If you are unsure about any part of the installation process, consult a qualified professional installer.
- 車両の電源がオフになっており、パーキングブレーキがかかっていることを確認してください。
- Disconnect the negative terminal of the vehicle's battery before starting.
- Use only appropriate tools for the installation.
- Avoid placing tools or components on hot surfaces or near moving parts.
- Keep all wiring clear of sharp edges and moving components.
パッケージ内容
インストールを開始する前に、すべてのコンポーネントが揃っていることを確認してください。
- Dash Kit (Main Bezel, Brackets)
- Axes Interface
- ワイヤハーネス
- Storage Pocket (for single DIN mounting)
- 取扱説明書(本書)
セットアップとインストール
This section outlines the general steps for installing the Metra 99-6525HG dash kit. Specific vehicle disassembly instructions may vary and should be referenced from a vehicle-specific service manual or online resources.
- 車両を準備する: Disconnect the negative battery terminal. Carefully remove the factory radio and associated trim panels from the dashboard. Refer to your vehicle's service manual for precise removal procedures.
- Assemble the Dash Kit:
- のために シングルDIN radio installation: Secure the provided storage pocket below the radio opening in the dash kit. Attach the single DIN mounting brackets to the sides of your aftermarket radio, then secure the radio and pocket assembly into the dash kit bezel.
- のために ダブルDIN radio installation: Attach the double DIN mounting brackets to the sides of your aftermarket radio, then secure the radio assembly into the dash kit bezel.
- 配線接続: Connect the included wiring harness to your aftermarket radio and the vehicle's factory wiring. Utilize the Axes interface as directed by its separate instructions to retain factory features such as steering wheel controls (if applicable). Ensure all connections are secure and properly insulated.
- テスト機能: Before reassembling the dashboard, temporarily reconnect the vehicle's battery and test the aftermarket radio's functionality (power, audio, steering wheel controls, etc.).
- 最終組立: Once all functions are verified, disconnect the battery again. Carefully route all wiring to prevent pinching or interference. Install the assembled dash kit with the aftermarket radio into the vehicle's dashboard opening. Reinstall all removed trim panels and secure them properly.
- バッテリーを再接続します: バッテリーのマイナス端子をつなぎ直します。
The kit is designed for an ISO Single/Double DIN mount, ensuring compatibility with a wide range of aftermarket head units.
操作手順
This dash kit provides the structural and aesthetic framework for installing an aftermarket radio. Operating instructions for the radio itself will be found in the manual provided by the radio manufacturer. Once installed, the radio will function according to its own specifications and controls.
メンテナンス
The Metra 99-6525HG dash kit requires minimal maintenance. To keep the high gloss black finish clean, gently wipe it with a soft, damp cloth. Avoid using abrasive cleaners or solvents, as these can damage the finish. Ensure no liquids enter the radio or vehicle's electrical components.
トラブルシューティング
If you encounter issues after installing the dash kit and aftermarket radio, consider the following:
- ラジオの電源が入らない:
- Check all wiring connections, especially power and ground wires, for secure contact.
- 車両の無線回路のヒューズが損傷していないことを確認します。
- Ensure the vehicle's battery is properly reconnected and charged.
- 音声なし:
- Confirm speaker wire connections are correct and secure.
- Check the radio's settings for mute or volume levels.
- ステアリングホイールコントロールが機能しない:
- Refer to the specific instructions for the Axes interface to ensure it is correctly wired and programmed for your vehicle and radio.
- Verify the interface is receiving power.
- Dash Kit Does Not Fit Flush:
- Ensure all factory mounting points are clear of obstructions.
- Double-check that the radio and brackets are correctly seated within the dash kit.
- Verify that no wires are pinched or preventing the kit from seating properly.
For persistent issues, consult the aftermarket radio's manual or contact Metra technical support.
仕様
| ブランド | メトラ |
| モデル名 | 99-6525HG |
| モデル番号 | 99-6525HG |
| 色 | ハイグロスブラック |
| 材料 | アクリロニトリル ブタジエン スチレン (ABS) プラスチック |
| 商品の寸法 (長さ x 幅 x 高さ) | 14 x 7.1 x 1インチ |
| アイテム重量 | 2 ポンド |
| 互換性 | 2011 - Up Chrysler 300 Vehicles |
| 取り付けタイプ | ISO Single/Double DIN |
| 含まれるコンポーネント | Dash Kit, Axes Interface, Wiring Harness, Storage Pocket |
保証情報
The Metra 99-6525HG Dash Kit comes with a 1年間の限定保証. This warranty covers defects in materials and workmanship under normal use. It does not cover damage resulting from improper installation, accident, misuse, abuse, neglect, unauthorized modification, or normal wear and tear. Please retain your proof of purchase for warranty claims.
サポート
For technical assistance, installation questions, or warranty inquiries, please contact Metra Electronics Corp. customer support. You can typically find contact information on the official Metra webサイトまたは製品を購入した小売店を通じて購入できます。
オンラインリソース: Visit the official Metra website for product updates, additional installation guides, and frequently asked questions.
Ask a question about this manual
Ask about setup, troubleshooting, compatibility, parts, safety, or missing instructions. Manuals+ will review the question and use this page’s manual context to help answer it.