導入
This manual provides detailed instructions for the setup, operation, and maintenance of your Homtime C12PRO Docking Station Speaker. The C12PRO integrates a Bluetooth speaker, FM radio, alarm clock, and dual USB charging capabilities, designed for convenient everyday use.
パッケージ内容
以下にリストされているすべてのアイテムがパッケージに含まれていることを確認してください。
- 1 x Homtime C12PRO Speaker Unit
- 電源アダプター x 1
- ユーザーマニュアル x 1
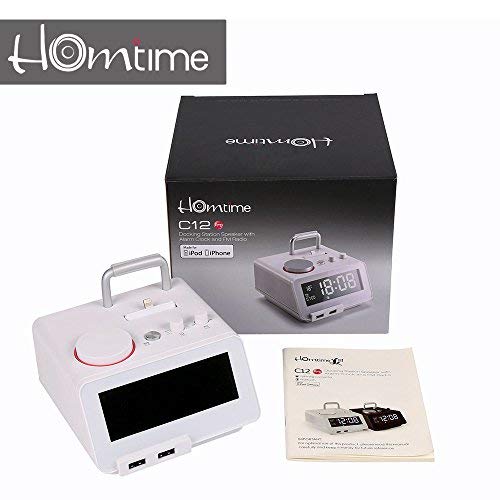
画像: Contents of the Homtime C12PRO package, showing the main speaker unit, power adapter, and the user manual.
製品終了view
Familiarize yourself with the various components and controls of your C12PRO unit.

画像: フロント view of the Homtime C12PRO with an iPhone docked. The large digital display shows time and temperature, and the front features dual USB charging ports.

画像: フロント view of the Homtime C12PRO without a phone docked. This image clearly shows the digital display, the docking connector, and the control buttons on the top surface.
フロントパネルとディスプレイ
- Large 4.2-inch LCD Display: Shows time, alarm status, and room temperature (Celsius or Fahrenheit). Brightness is adjustable.
- デュアルUSB充電ポート: Located at the front base for convenient charging of external devices.
トップパネルコントロール
- ドッキングコネクタ: Apple Certified Lightning connector for iPod/iPhone.
- コントロールボタン/ノブ: For setting time, alarm, volume, mode selection, and FM radio tuning.
背面パネルの接続
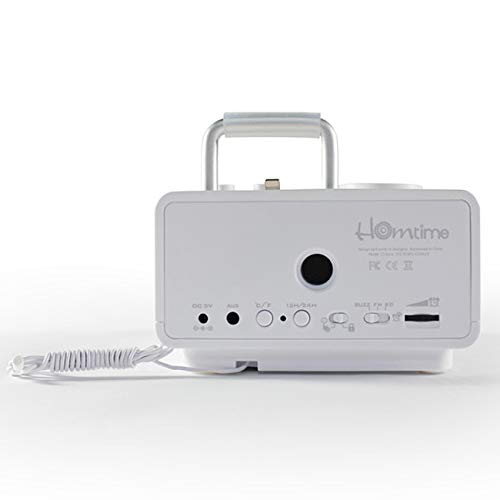
画像: 後方 view of the Homtime C12PRO. This image displays the DC 9V power input, AUX-in port, 12H/24H time format button, and other rear controls.
- DC 9V電源入力: 付属の電源アダプターをここに接続します。
- AUX入力ポート: 外部オーディオソースを接続するための 3.5mm ジャック。
- 12H/24H Button: Toggles between 12-hour and 24-hour time display formats.
- その他のコントロール: May include snooze/dimmer, alarm on/off, and FM antenna connection.
設定
- ユニットを開梱します: Carefully remove the C12PRO speaker and all accessories from the packaging.
- 接続電源: Insert the DC plug of the power adapter into the DC 9V input port on the rear of the unit. Plug the power adapter into a standard wall outlet. The display will illuminate.
- 初期時間設定:
- を押し続けます 時間設定 button (location may vary, typically on top or rear).
- 使用 +/- buttons or rotary knob to adjust the hour. Press 時間設定 再度確認します。
- Adjust the minute using the +/- buttons or rotary knob. Press 時間設定 確認して時間設定モードを終了します。
- 12時間形式と24時間形式を切り替えるには、 12時間/24時間 背面パネルのボタン。
- ディスプレイの明るさを調整します。 を押す スヌーズ/ディマー button (often combined) repeatedly to cycle through brightness levels.
- 設定温度単位: 該当する場合は、 °C /°F button to switch between Celsius and Fahrenheit display for room temperature.
操作手順
電源オン/オフ
を押す 力 button to turn the unit on or off. When off, the clock display remains active.
アラームを設定する
- を押し続けます アラームセット ボタンを押します。アラームの時刻が点滅します。
- 使用 +/- buttons or rotary knob to adjust the alarm hour. Press アラームセット 確認します。
- アラームの分を調整します。 アラームセット 確認します。
- Select the alarm source (Buzzer, FM Radio, or Docked Device). Use +/- or rotary knob and press アラームセット 確認します。
- アラームをオン/オフにするには、 アラームのオン/オフ ボタンを押します。アラームがオンになると、ディスプレイにアラームアイコンが表示されます。
- アラームが鳴ったら、を押します スヌーズ button to temporarily silence it for a few minutes. Press 力 その日のアラームをオフにします。
FMラジオの操作
- を押す モード ディスプレイに「FM」が表示されるまでボタンを押します。
- 自動ステーションスキャンの場合は、 再生/一時停止 ボタン(または専用の スキャン button). The radio will scan and save available stations.
- 手動で調整するには、 前/次 buttons or rotary knob to adjust the frequency.
- To select a saved station, press the プリセット ボタンをクリックしてから使用します 前/次 ナビゲートします。
- を使用して音量を調整します 音量 knob or buttons.
Bluetoothペアリング
- を押す モード button until "BT" or "Bluetooth" appears on the display. The Bluetooth indicator will flash, indicating pairing mode.
- モバイル デバイスで Bluetooth を有効にし、新しいデバイスを検索します。
- Select "Homtime C12PRO" from the list of available devices.
- Once paired, the Bluetooth indicator on the C12PRO will stop flashing and remain solid. You can now play audio wirelessly from your device.
- Adjust volume on both the C12PRO and your connected device.
ドッキング ステーションの使用
The C12PRO features an Apple Certified Lightning connector for compatible iPod/iPhone devices.
- Carefully align your iPhone/iPod with the Lightning connector on the top of the unit.
- Gently push down until the device is securely seated.
- The C12PRO will automatically charge your device and can play audio from it.
- を押す モード button to select the docking station as the audio source.
USB充電
The unit includes dual USB ports for charging other devices.
- Connect your USB charging cable to one of the USB ports on the front of the C12PRO.
- Connect the other end of the cable to your device (e.g., Android phone, tablet).
- The C12PRO will provide power to charge your device.
AUX入力接続
Connect external audio players via the 3.5mm AUX-in port.
- Connect a 3.5mm audio cable (not included) from your external audio device's headphone jack to the AUX-in port on the rear of the C12PRO.
- を押す モード ディスプレイに「AUX」が表示されるまでボタンを押します。
- Play audio from your external device. Adjust volume on both the C12PRO and the external device.
メンテナンス
- クリーニング: Disconnect the power adapter before cleaning. Use a soft, dry cloth to wipe the exterior surfaces. Do not use abrasive cleaners, waxes, or solvents.
- ストレージ: ユニットを長期間保管する場合は、電源を外し、直射日光や極端な温度を避けて、涼しく乾燥した場所に保管してください。
- バッテリー: The unit contains a CR2 battery (included) for clock memory backup. This battery is not user-replaceable for general operation and should only be replaced by qualified service personnel if necessary.
トラブルシューティング
| 問題 | 考えられる原因 | 解決 |
|---|---|---|
| 電源なし/ディスプレイオフ | 電源アダプターが接続されていないか、コンセントに障害があります。 | 電源アダプタがユニットと機能している壁のコンセントにしっかりと差し込まれていることを確認します。 |
| スピーカーから音が出ない | Volume too low; incorrect source selected; device not connected properly. | 音量を上げる。押す モード to select the correct audio source (BT, FM, Dock, AUX). Reconnect Bluetooth device or docked phone. |
| Bluetoothペアリングが失敗する | C12PRO not in pairing mode; device too far; interference. | Ensure C12PRO is in BT mode and flashing. Move device closer. Turn off other Bluetooth devices. |
| FMラジオの雑音/受信状態が悪い | 信号が弱い。アンテナが伸びていない。 | Extend the FM antenna fully. Reposition the unit for better reception. Perform auto-scan again. |
| アラームが鳴らない | Alarm not activated; alarm volume too low. | ディスプレイにアラームアイコンが表示されていることを確認してください。アラームの音量設定を確認してください。 |
| Device not charging via USB/Dock | Cable issue; device not compatible; unit not powered. | Try a different USB cable. Ensure the C12PRO is powered on. Verify device compatibility with the Lightning dock. |
仕様

画像: A table detailing the specifications of the Homtime C12PRO, including driver units, S/N ratio, Bluetooth version, range, radio frequency, power, and dimensions.
| モデル | C12プロ |
| ドライバーユニット | 2x40mm |
| S/N比 | >70デシベル |
| Bluetoothバージョン | 2.1 +EDR |
| Bluetooth範囲 | 10メートル |
| 無線周波数範囲 | 87.5MHz~108MHz |
| 対応デバイス | iPad, iPhone, Android, Windows Phone, Computer |
| 電源アダプター | AC100-240V, 50/60Hz, DC 5V 3A |
| 出力電力 | 3W + 3W (6 Watts total) |
| 寸法(長さx幅x高さ) | 12.8 x 12.9 x 10.7 cm |
| アイテム重量 | 800グラム |
| オーディオソース | Apple Lightning, USB, Bluetooth, Aux-in |
| 表示タイプ | Digital LCD (4.2 inches) |
| バッテリー | 1 CR2 battery required (included for clock memory) |
保証とサポート
保証情報
The Homtime C12PRO comes with a 1年間の限定保証 from the date of purchase. This warranty covers manufacturing defects in materials and workmanship under normal use. It does not cover damage caused by misuse, accidents, unauthorized modifications, or external causes.
保証請求のために購入証明書を保管してください。
カスタマーサポート
For technical assistance, troubleshooting not covered in this manual, or warranty inquiries, please contact Homtime customer support. Refer to the contact information provided with your product packaging or visit the official Homtime web最新のサポート詳細については、サイトをご覧ください。