
1. はじめに
This manual provides essential information for the safe and efficient operation, setup, and maintenance of your Scheppach Basa3 12 Band Saw. Please read this manual thoroughly before operating the machine to ensure proper use and to prevent injury or damage.
The Scheppach Basa3 12 is a robust band saw designed for precise cutting of various materials, primarily wood and aluminum. It features a powerful 800 Watt motor, a large cast iron table, and adjustable settings for versatile applications.
2.一般的な安全情報
WARNING: Always follow basic safety precautions when using electric tools to reduce the risk of fire, electric shock, and personal injury.
- 作業エリアの安全性: 作業場は清潔に保ち、十分な明るさを確保してください。雑然とした場所や暗い場所は事故を招きます。可燃性の液体、ガス、粉塵など、爆発性雰囲気下では電動工具を使用しないでください。
- 電気安全: 電動工具のプラグはコンセントのプラグに適合している必要があります。プラグを改造しないでください。アースまたは接地された表面への身体の接触を避けてください。
- 個人の安全: Always wear eye protection, hearing protection, and a dust mask. Do not overreach. Keep proper footing and balance at all times. Dress properly; avoid loose clothing, jewelry, and long hair that can be caught in moving parts.
- ツールの使用と手入れ: 電動工具に無理な力を加えないでください。用途に適した電動工具を使用してください。電動工具の調整、アクセサリの交換、保管を行う前には、必ず電源プラグを電源から抜いてください。
- バンドソーの安全性について: Ensure blade guards are in place and properly adjusted. Keep hands clear of the blade path. Use push sticks when cutting small pieces.
3. コンポーネントとパッケージの内容
Your Scheppach Basa3 12 Band Saw package includes the following main components:
- Band Saw Unit
- Stand/Base Frame
- Cross-cut Gauge (Miter Gauge)
- Rip Fence (Parallel Guide)
- Operating Handle (for mobility)

図3.1:以上view of the Scheppach Basa3 12 Band Saw with its stand and included cross-cut gauge.
4. セットアップと組み立て
Before initial operation, the band saw requires assembly of its stand and proper installation of the blade and accessories.
4.1 スタンドの組み立て
Carefully unpack all components. Assemble the stand according to the diagrams provided in the separate assembly instructions. Ensure all bolts and nuts are securely tightened. The stand provides a stable base for the band saw and includes wheels for easy repositioning.

Figure 4.1: The integrated wheels and handle allow for easy tilting and movement of the band saw.
4.2 バンドソーユニットの取り付け
Once the stand is assembled, carefully lift the band saw unit and secure it to the stand using the provided hardware. Ensure it is firmly attached and stable before proceeding.
4.3 ブレードの取り付けと張力調整
Refer to the specific blade installation instructions for your model. Proper blade tension is crucial for accurate cuts and blade longevity. Adjust the blade tension knob until the blade is taut but not overly stressed.
4.4 集塵装置の接続
The Scheppach Basa3 12 is equipped with a dust extraction port. Connect a suitable dust collection system or shop vacuum to this port to minimize sawdust accumulation and improve air quality during operation.
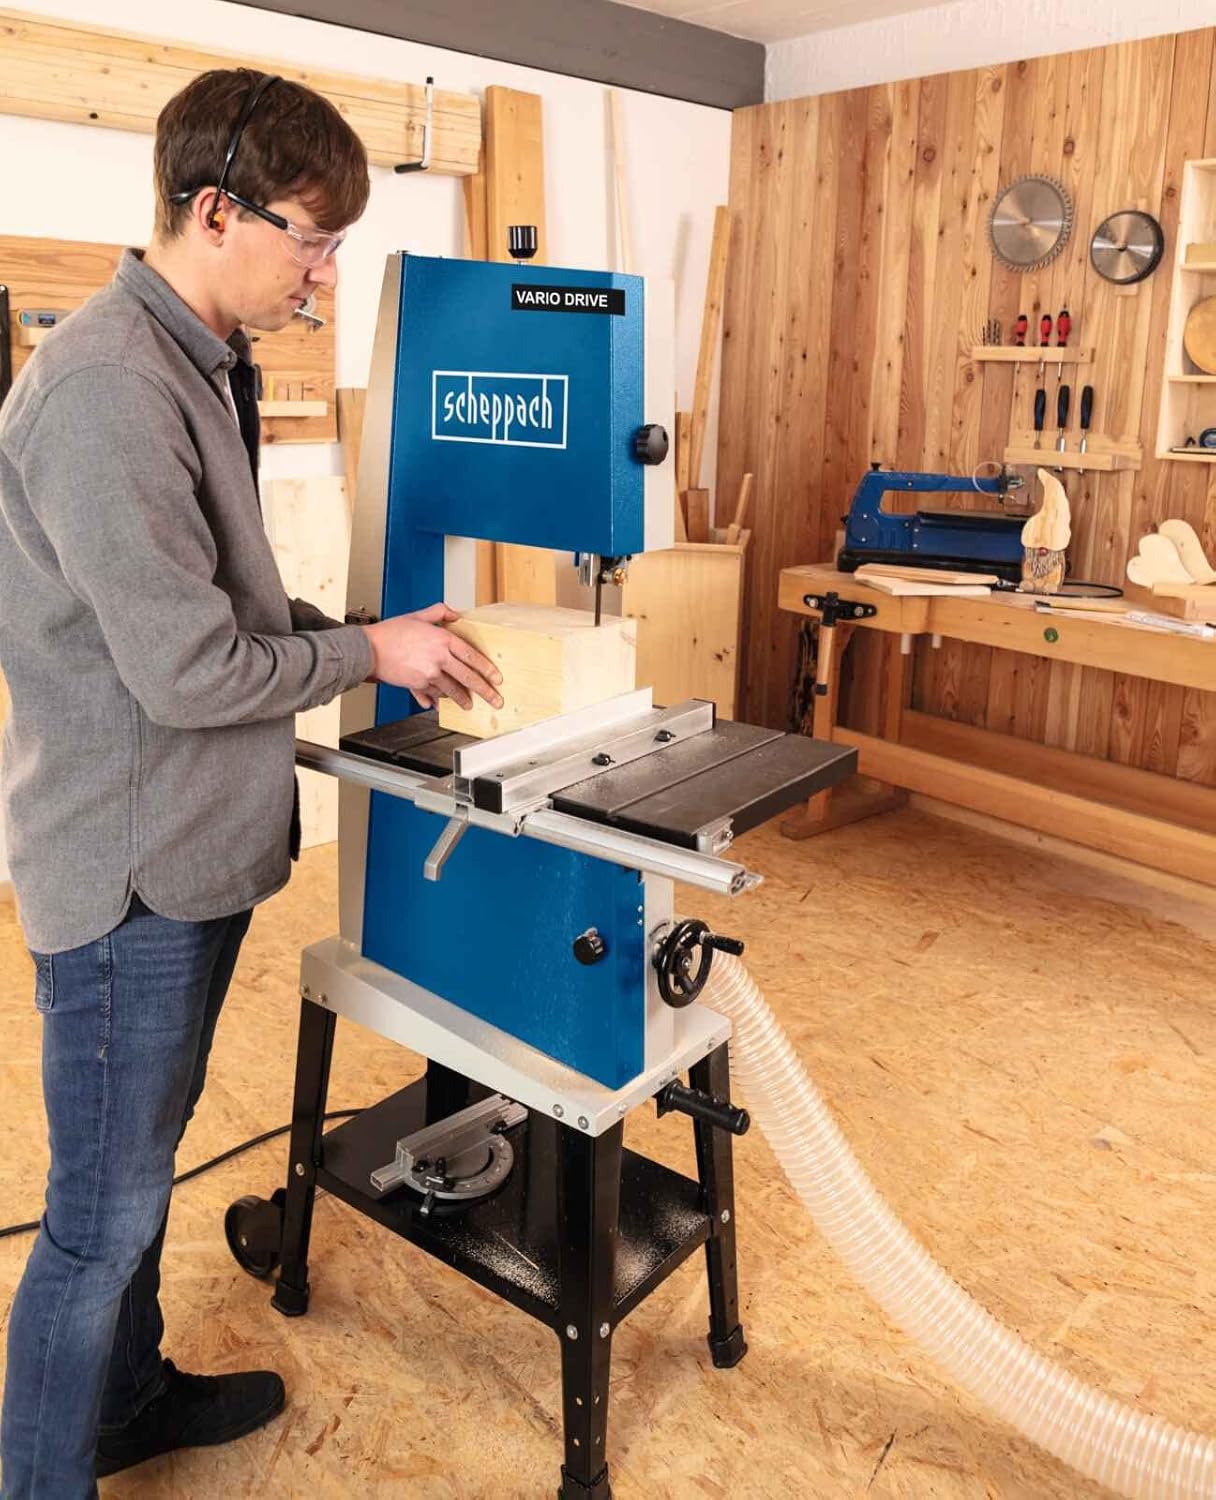
Figure 4.2: Connecting a dust extraction hose to the band saw for cleaner operation.
5. 操作手順
Familiarize yourself with the controls and adjustments before making any cuts.
5.1 電源のオン/オフ
Locate the main power switch, typically a large red button for emergency stop and a green button for start. Ensure the work area is clear before starting the machine.
5.2 Adjusting Blade Guides
The blade guides (upper and lower) must be adjusted to be just clear of the blade, providing support without causing friction. This prevents blade deflection and ensures straight cuts.
5.3 テーブルの傾き調整
The work table can be tilted for angled cuts. Loosen the locking mechanism beneath the table, adjust to the desired angle (up to 45 degrees), and then securely tighten the lock. The machine features continuous table adjustment.

Figure 5.1: Adjusting the work table for angled cuts.
5.4 Using the Rip Fence and Cross-cut Gauge
The rip fence is used for making straight, parallel cuts. Position it at the desired distance from the blade and lock it in place. The cross-cut gauge (miter gauge) is inserted into the table slot and used for making accurate cross-cuts and angled cuts across the width of the workpiece.
5.5 切断作業
Place the workpiece firmly on the table. Turn on the machine and allow the blade to reach full speed. Feed the workpiece slowly and steadily into the blade, applying even pressure. Always keep your hands away from the blade path and use a push stick when necessary.

Figure 5.2: Proper technique for feeding material into the band saw.
6. メンテナンス
Regular maintenance ensures the longevity and optimal performance of your band saw. Always disconnect the machine from the power supply before performing any maintenance.
6.1 クリーニング
After each use, clean the machine to remove sawdust and debris. Use a brush or vacuum cleaner. Do not use solvents that could damage painted surfaces or plastic components.
6.2 ブレード交換
Blades will dull over time and need replacement. Follow the instructions for releasing blade tension, removing the old blade, and installing a new one. Ensure the new blade is correctly seated on the wheels and properly tensioned.
6.3 Belt and Pulley Inspection
Periodically inspect the drive belt and pulleys for wear or damage. A worn belt can lead to reduced power and inconsistent blade speed. Replace if necessary.

図6.1:内部 view of the drive system, showing the belt and pulleys.
7。 トラブルシューティング
このセクションでは、バンドソーで発生する可能性のある一般的な問題について説明します。
| 問題 | 考えられる原因 | 解決 |
|---|---|---|
| 刃が動いたり、不正確に切れたりする | Dull blade, incorrect blade tension, misaligned blade guides, worn blade. | Replace blade, adjust blade tension, adjust blade guides, check for blade damage. |
| Motor runs but blade does not move or moves slowly | Loose or broken drive belt, obstruction in blade path. | Inspect and replace drive belt if necessary, remove any obstructions. |
| 過度の振動や騒音 | Loose components, unbalanced blade, worn bearings. | Check all fasteners, replace blade, consult a qualified technician for bearing issues. |
| 集塵が効果的ではない | Clogged dust port, inadequate dust collector, loose hose connection. | Clear dust port, use a more powerful dust collector, secure hose connections. |
8. 技術仕様
Key technical data for the Scheppach Basa3 12 Band Saw:
| 仕様 | 価値 |
|---|---|
| モデル | Basa3 - 230 V |
| 製造元リファレンス | 1901503901 |
| 巻tage | 230ボルト |
| 力 | 800ワット |
| バンドホイール直径 | 315ミリメートル |
| Table Dimensions (L x W) | 54.8 x 40 cm |
| 刃の長さ | 306ミリメートル |
| スピード | 750回転 |
| 製品寸法(長さ x 幅 x 高さ) | 45 x 50 x 20 cm (shipping/package) / 116L x 62W x 42H cm (assembled) |
| 重さ | 9999 Kilograms (Note: This weight appears to be a placeholder or error in source data) |
| 材質(ハンドル/レバー) | 金属とプラスチック |
| ブレード材質 | 合金鋼 |
| 推奨される表面 | アルミニウム、木材 |
| 特集 | Continuous table adjustment |
| 認証 | CE |
9. 保証とサポート
For warranty information, please refer to the documentation included with your purchase or contact Scheppach customer service directly. Information regarding the availability of spare parts is not explicitly provided in the product details. For technical support or spare parts inquiries, it is recommended to contact Scheppach or your authorized dealer.
You can find more information about Scheppach products and support on their official webサイトまたは正規販売店を通じてお問い合わせください。