1。 オーバーview
The HyperX Cloud II is a high-performance gaming headset designed for comfort and superior audio quality across multiple platforms. It features virtual 7.1 surround sound, large 53mm drivers, and a durable aluminum frame. The headset is equipped with comfortable memory foam ear cushions and a detachable noise-cancelling microphone for clear communication.

Image 1: The HyperX Cloud II Gaming Headset in Gun Metal, showcasinデザインと取り外し可能なマイクが特徴。
Video 1: An official product video highlighting the key features and design of the HyperX Cloud II Gaming Headset.
2. 箱の中身
- HyperX Cloud II ゲーミングヘッドセット
- 取り外し可能なノイズキャンセリングマイク
- USB Sound Card Audio Control Box
- PC延長ケーブル
- クイックスタートガイド
- Additional Velour Ear Cushions (pre-installed are leatherette)
3. セットアップ
3.1 ヘッドセットの接続
- Connect the detachable microphone to the headset's microphone port on the left ear cup.
- For PC and Mac, connect the headset's 3.5mm jack to the USB Sound Card Audio Control Box. Then, plug the USB connector of the control box into an available USB port on your computer.
- For PS4, Xbox One, Nintendo Switch, and mobile devices, connect the headset's 3.5mm jack directly to the controller or device's audio port. The USB Sound Card Audio Control Box is not typically used for these connections for optimal stereo sound.

Image 2: A diagram illustrating the multi-platform compatibility of the HyperX Cloud II, showing USB connection for PC/Playstation/Nintendo Switch and 3.5mm connection for Xbox Controller/Mobile/VR.
3.2 Configuring 7.1 Virtual Surround Sound (PC/Mac)
The HyperX Cloud II features a USB sound card audio control box that enables virtual 7.1 surround sound on PC and Mac. Follow these steps to ensure proper configuration:
Windowsの場合:
- Open the Control Panel and navigate to 'Hardware and Sound', then select 'Sound'.
- In the 'Playback' tab, locate 'HyperX 7.1 Audio' (or 'USB Audio'). If it's not the default device, right-click and select 'Set as Default Device'. A green checkmark will appear.
- Repeat the same steps for the microphone under the 'Recording' tab, selecting 'HyperX 7.1 Audio' (or 'USB Audio') as the default input device.
Macの場合:
- Click the Apple menu and select 'System Preferences'.
- Click on the 'Sound' icon.
- In the 'Input' tab, select 'HyperX 7.1 Audio' (or 'USB Audio') for default sound input.
- In the 'Output' tab, select 'HyperX 7.1 Audio' (or 'USB Audio') for default sound output.
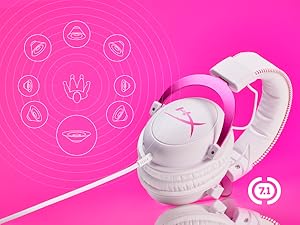
Image 3: The HyperX Cloud II headset with an overlay indicating its 7.1 virtual surround sound capability.
4. ヘッドセットの操作
4.1 Audio Control Box Functions
The USB Sound Card Audio Control Box provides convenient access to audio settings:
- ヘッドフォンの音量コントロール: Use the '+' and '-' buttons on the left side to adjust headphone volume.
- マイクの音量調節: Use the '+' and '-' buttons on the right side to adjust microphone volume.
- 7.1 サラウンドサウンド切り替え: Press the '7.1' button in the center to activate or deactivate virtual 7.1 surround sound.
- マイクミュート: Use the switch on the side of the control box to quickly mute or unmute the microphone.
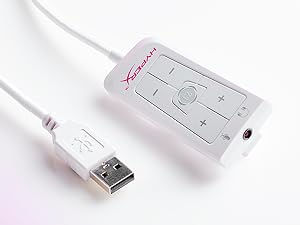
Image 4: The Advanced USB Sound Card Audio Control Box for the HyperX Cloud II headset, showing volume controls and 7.1 surround sound toggle.
4.2 取り外し可能なマイク
The noise-cancelling microphone can be detached when not needed, allowing the headset to be used for music listening or other audio without the microphone boom in the way.

画像5: クローズアップ view of the HyperX Cloud II's detachable, noise-cancelling microphone.
5. メンテナンス
5.1 イヤークッションの交換
The HyperX Cloud II comes with both leatherette and velour ear cushions. These are replaceable, allowing you to maintain comfort and hygiene over time. To replace, gently pull off the existing ear cushions and press the new ones onto the ear cups until securely attached.
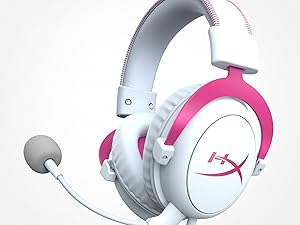
Image 6: The HyperX Cloud II headset highlighting its comfortable memory foam ear cushions.
Video 2: A video demonstrating the memory foam ear cushions of the HyperX Cloud II headset, emphasizing their comfort and flexibility.
5.2一般的なケア
- ヘッドセットを使用しないときは、清潔で乾燥した場所に保管してください。
- ヘッドセットを極端な温度や湿度にさらさないでください。
- イヤークッションとヘッドバンドを柔らかくて清潔な布で拭いてください。amp 布で拭いてください。強い化学薬品は使用しないでください。
6。 トラブルシューティング
6.1 No Audio or Microphone Function
- 接続を確認してください: Ensure all cables (3.5mm jack, USB) are securely connected to the headset, control box, and device.
- Default Audio Device: Verify that 'HyperX 7.1 Audio' (or 'USB Audio') is set as the default playback and recording device in your operating system's sound settings (refer to Section 3.2 for detailed steps).
- 音量レベル: Check both the headset's volume controls on the audio control box and your device's system volume. Ensure the microphone is not muted.
- Microphone Detached: Confirm the detachable microphone is fully inserted into its port.
7. 仕様
| 特徴 | 仕様 |
|---|---|
| ブランド | ハイパーX |
| モデル番号 | KHX-HSCP-GM |
| 色 | ガンメタル |
| 耳の位置 | オーバーイヤー |
| インピーダンス | 60オーム |
| 周波数応答 | 15-25kKhz |
| オーディオドライバーのサイズ | 53ミリメートル |
| 騒音制御 | パッシブノイズキャンセリング |
| 接続技術 | 有線(3.5 mmジャック、USB) |
| 対応デバイス | PC, Mac, PS4, PS5, Xbox Series X|S, Xbox One, Nintendo Switch, Mobile, VR |
| 材料 | アルミニウム、合成皮革 |
| アイテム重量 | 11.29オンス |
8. 保証とサポート
詳細な保証情報とテクニカルサポートについては、HyperXの公式ウェブサイトをご覧ください。 webまたは製品に付属の保証書をご覧ください。 AmazonのHyperXストア 追加のリソース。