
重要な安全情報
Read all instructions carefully before installation and operation. Failure to follow these instructions may result in electric shock, fire, or serious injury. This device is intended for indoor use only.
- 警告: 感電の危険があります。設置またはメンテナンスを行う前に、回路ブレーカーまたはヒューズボックスの電源を切ってください。
- 設置は資格のある電気技師または訓練を受けた担当者が行う必要があります。
- すべての配線接続が安全であり、地域の電気規則に準拠していることを確認してください。
- タイマーの最大電気定格を超えないでください。
- Keep children away from the timer and wiring during installation and operation.
製品終了view
The Intermatic 610224 is a digital 7-day programmable timer designed to automate the ON/OFF switching of electrical loads such as lights, fans, and other appliances. It features a clear digital display and intuitive controls for setting daily or weekly schedules. This timer operates at 120V AC and can handle loads up to 15 Ampそうです。
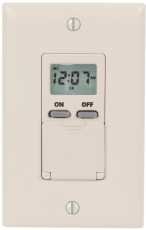
画像: フロント view of the Intermatic 610224 Digital 7-Day Timer. The image displays the timer's ivory-colored faceplate with a digital screen at the top and several control buttons below it. The buttons are arranged for setting time, programming, and manual override functions.
インストール
Follow these steps to properly install your Intermatic 610224 Digital 7-Day Timer.
- 電源を切る: Locate the circuit breaker or fuse that controls the power to the switch you are replacing. Turn off the power completely. Verify power is off using a voltageテスター。
- 既存のスイッチを削除します。 Carefully remove the wall plate and unscrew the existing switch from the wall box. Disconnect the wires from the old switch, noting which wire is connected to which terminal (Line, Load, Neutral, Ground).
- 配線接続: The Intermatic 610224 timer requires Line (hot), Load, Neutral, and Ground connections. Connect the wires from the wall box to the corresponding terminals on the timer:
- 接続する ライン(ホット) wire (usually black) from the power source to the terminal marked 'LINE'.
- 接続する 負荷 wire (usually black, going to the fixture) to the terminal marked 'LOAD'.
- 接続する 中性 wire (usually white) to the terminal marked 'NEUTRAL'.
- 接続する 地面 wire (usually bare copper or green) to the terminal marked 'GROUND'.
Note: A wiring diagram is typically included with the product packaging. Ensure all connections are tight and secure.
- 取り付け: Gently push the wired timer into the wall box. Secure it with the provided screws. Attach the new wall plate.
- 電力を回復する: Turn the power back on at the circuit breaker or fuse box. The timer display should illuminate.
操作手順
This section details how to set the current time and program ON/OFF events for your timer.
現在の時刻と日付の設定
- Press the 'CLOCK' button. The time display will flash.
- Use the 'HOUR' and 'MIN' buttons to adjust the current hour and minute.
- Press the 'DAY' button to select the current day of the week.
- Press 'CLOCK' again to save the settings and exit.
Programming ON/OFF Events
The timer allows for multiple ON/OFF programs per day. Refer to your specific model's manual for the exact number of programs (typically up to 14 ON and 14 OFF events).
- Press the 'PROG' button. The display will show '1 ON' and the time will flash.
- Use the 'HOUR' and 'MIN' buttons to set the desired ON time for program 1.
- Press the 'DAY' button repeatedly to select the day(s) of the week for this program (e.g., Mon-Sun, Mon-Fri, Sat-Sun, individual days).
- Press 'PROG' again. The display will show '1 OFF' and the time will flash.
- Use the 'HOUR' and 'MIN' buttons to set the desired OFF time for program 1.
- Press the 'DAY' button to select the day(s) for this OFF program, matching the ON program.
- 追加のオン/オフ プログラム (「2 オン」、「2 オフ」など) については、手順 1 ~ 6 を繰り返します。
- After setting all desired programs, press the 'CLOCK' button to exit programming mode.
手動オーバーライド
To temporarily override the current program without deleting it:
- Press the 'MANUAL' button. This will cycle the output between ON, OFF, and AUTO modes.
- In 'AUTO' mode, the timer follows the programmed schedule.
- In 'ON' or 'OFF' mode, the timer will remain in that state until the next programmed event or until 'MANUAL' is pressed again to return to 'AUTO'.
夏時間の調整
Some models may have an automatic Daylight Saving Time adjustment feature. If not, manually adjust the time by one hour forward or backward as required using the 'HOUR' button in clock setting mode.
メンテナンス
The Intermatic 610224 Digital 7-Day Timer requires minimal maintenance.
- クリーニング: タイマーを清掃するには、表面を柔らかくて乾いた布で拭いてください。amp 布で拭いてください。研磨剤入りの洗剤や溶剤は、表面や内部部品を傷める恐れがあるため使用しないでください。
- バッテリーバックアップ: This timer typically includes an internal battery backup to retain programmed settings during power outages. The battery is usually non-replaceable by the user and designed to last the life of the product. If the display is blank or programs are lost after a power outage, the battery may be depleted, indicating the unit may need replacement.
トラブルシューティング
If you encounter issues with your timer, refer to the following common problems and solutions.
| 問題 | 考えられる原因 | 解決 |
|---|---|---|
| タイマー表示が空白です。 | タイマーに電源が供給されていません。 | ブレーカーまたはヒューズを確認してください。配線接続が確実に行われていることを確認してください。 |
| タイマーがプログラムされた時間にオン/オフになりません。 | Incorrect programming; Timer is in Manual ON/OFF mode. | Review programming steps. Ensure timer is in 'AUTO' mode (press 'MANUAL' button until 'AUTO' is displayed). |
| 停電後の時刻が不正確tage. | 内部バッテリーバックアップが消耗しました。 | Reset the current time and day. If this occurs frequently, the timer may need replacement. |
| Load (light/appliance) does not turn on. | Load is faulty; Wiring issue; Timer is OFF. | Test the load directly. Check wiring connections. Ensure timer is programmed to ON or manually set to ON. |
仕様
- モデル: 610224
- 巻tage: 120V AC、60Hz
- 現在の評価: 15A Resistive, 10A Tungsten, 1/2 HP
- Program Cycles: 7日間
- プログラム: Up to 28 ON/OFF events (14 ON, 14 OFF)
- 動作温度: 0°C ~ 50°C (32°F ~ 122°F)
- 囲い: Ivory, Wall Mount
保証とサポート
Intermatic products are manufactured to high-quality standards and are backed by a manufacturer's warranty. For specific warranty details, please refer to the warranty card included with your product or visit the official Intermatic webサイト。
For technical support, troubleshooting assistance, or to inquire about replacement parts, please contact Intermatic customer service. Contact information can typically be found on the product packaging or the manufacturer's webサイト。