Sungale PF1501
Sungale PF1501 14インチ デジタルフォトフレーム ユーザーマニュアル
モデル: PF1501
1. はじめに
This manual provides detailed instructions for the setup, operation, and maintenance of your Sungale PF1501 14-Inch Digital Photo Frame. This device is designed to display digital photos, play videos, and play music, offering a versatile way to enjoy your media.
適切な機能を確保し、ユーザーエクスペリエンスを最大限に高めるために、製品を使用する前にこのマニュアルをよくお読みください。
2. パッケージ内容
以下にリストされているすべてのアイテムがパッケージに含まれていることを確認してください。
- Sungale PF1501 14-Inch Digital Photo Frame
- AC電源アダプター
- リモートコントロール
- クイックスタートガイド
- Limited Warranty Card
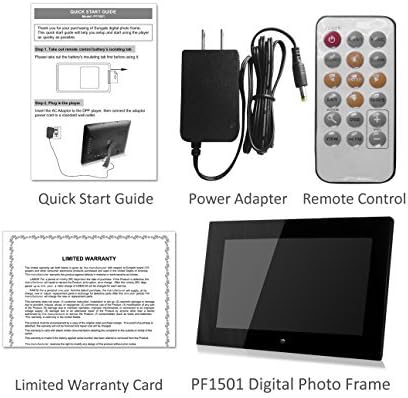
Image 2.1: Included accessories and the digital photo frame.
3.製品オーバーview
3.1フロント View

画像3.1:正面 view of the digital photo frame.
3.2 リア View およびポート

画像3.2:リア view with labeled ports and controls.
The rear of the frame features various ports and controls for connectivity and operation:
- ファンクションキー: Buttons for navigation and control (Enter, Left, Right, Up, Down, Exit).
- 壁掛け可能: Mounting points for wall installation.
- 内蔵スピーカー: オーディオ再生用。
- DC 12V電源ポート: ここにAC電源アダプターを接続します。
- Removable Bracket: Stand for desktop placement.
- 電源ボタン: To turn the frame on or off.
- USB ホスト ポート: USB フラッシュドライブを接続します。
- SD/SDHC カードスロット: For inserting SD or SDHC memory cards.
- USBデバイスポート: コンピューターに接続します。
4. セットアップ
4.1 初期電源投入
- 接続電源: Insert the AC power adapter into the DC 12V Power Port on the back of the frame. Plug the other end into a standard electrical outlet.
- 電源オン: Press the Power button located on the back of the frame. The frame will power on and display the initial setup screen or default content.
4.2 Inserting Memory Cards or USB Drives
The frame supports SD/SDHC cards and USB flash drives (up to 32GB). It also has 4GB of internal memory.
- For SD/SDHC Card: Gently insert an SD or SDHC card into the SD/SDHC Card Slot until it clicks into place. Ensure the card is inserted in the correct orientation.
- For USB Flash Drive: Insert a USB flash drive into the USB Host Port.
The frame should automatically detect the inserted media and begin displaying content or prompt you to select a source.
4.3 壁掛け(オプション)
The frame can be wall-mounted using the designated mounting points on the rear. Ensure appropriate wall anchors and screws are used for secure installation.
5. 操作手順
The digital photo frame can be operated using the function keys on the back or the included remote control.
5.1リモコン機能
The remote control provides convenient access to all features. Point the remote control directly at the frame's sensor.
5.2 メニューの操作
Use the directional buttons (Up, Down, Left, Right) to navigate through menu options. Press the "Enter" button to confirm a selection. The "Exit" button typically returns to the previous screen or the main menu.
5.3 写真の表示
The frame supports JPG and BMP photo file フォーマット。
- ソースを選択: From the main menu, select the desired media source (Internal Memory, SD Card, or USB Drive).
- Choose Photo Mode: Select "Photo" to enter photo display mode.
- スライドショー: The frame can automatically start a slideshow of all photos on the selected source. You can adjust transition effects and interval times in the settings.
- Single Photo Display: Navigate to a specific photo and press "Enter" to display it individually.
- ズームと回転: Use the remote control or function keys to zoom in/out or rotate displayed photos.
5.4 ビデオの再生
The frame supports video playback. Note that some users have reported compatibility primarily with .AVI video files.
- ソースを選択: From the main menu, select the desired media source.
- Choose Video Mode: Select "Video" to enter video playback mode.
- Select Video: 目的のビデオに移動します file and press "Enter" to begin playback.
5.5音楽の再生
The frame can play background music during photo slideshows or as standalone audio.
- ソースを選択: From the main menu, select the desired media source.
- Choose Music Mode: Select "Music" to enter music playback mode.
- オーディオを選択 File: Navigate to the desired audio file and press "Enter" to begin playback.
- バックグラウンドミュージック: In photo settings, you can enable background music to play during slideshows.
5.6 Calendar and Alarm Clock
Access the calendar and alarm clock functions through the main menu. Follow on-screen prompts to set the date, time, and alarm preferences.
6. メンテナンス
6.1 画面のクリーニング
- Turn off and unplug the frame before cleaning.
- マイクロファイバークロスなどの柔らかく糸くずの出ない布を使用して、画面を優しく拭いてください。
- 頑固な汚れには、軽くamp布に水または電子機器専用の画面洗浄液を含ませてください。画面に直接液体を吹きかけないでください。
- Avoid using abrasive cleaners, solvents, or alcohol-based solutions, as these can damage the screen surface.
6.2一般的なケア
- Keep the frame away from direct sunlight, heat sources, and excessive moisture.
- フレームを落としたり、強い衝撃を与えたりしないでください。
- Do not block the ventilation openings on the back of the frame.
- Unplug the frame during lightning storms or when unused for extended periods.
7。 トラブルシューティング
If you encounter issues with your digital photo frame, refer to the following common problems and solutions:
| 問題 | 考えられる原因 / 解決策 |
|---|---|
| フレームの電源が入りません。 |
|
| "File not supported" error or media not displaying. |
|
| リモコンが動作しません。 |
|
| Photos are stretched or distorted. |
|
| Slideshow not playing randomly. |
|
8. 仕様
| 特徴 | 詳細 |
|---|---|
| モデル番号 | PF1501 |
| 画面サイズ | 14インチ |
| 解決 | 1366x768ピクセル |
| 内部メモリ | 4GB |
| 外部メモリのサポート | SD/SDHC Card (up to 32GB), USB Flash Drive (up to 32GB) |
| サポートされている写真形式 | JPG、BMP |
| サポートされているビデオ形式 | Primarily AVI (as reported by users) |
| オーディオ出力 | 2 Channel Stereo Speakers |
| 製品寸法 | 13.8 x 1 x 9.5インチ |
| アイテム重量 | 2ポンド |
| 色 | 黒 |
| メーカー | スンゲール |
9. 保証とサポート
9.1 限定保証
This product comes with a Limited Warranty. Please refer to the "Limited Warranty Card" included in your package for detailed terms and conditions, including coverage period and claim procedures. Keep your proof of purchase for warranty claims.
9.2 カスタマーサポート
For technical assistance, troubleshooting beyond this manual, or warranty inquiries, please contact Sungale customer support.
- メーカー: スンゲール
- Webサイト: Visit the Sungale Store on Amazon (ブランド全般の情報)
- Specific contact information (phone, email) may be found on the warranty card or the official Sungale webサイト。
Ask a question about this manual
Ask about setup, troubleshooting, compatibility, parts, safety, or missing instructions. Manuals+ will review the question and use this page’s manual context to help answer it.