1. はじめに
This manual provides detailed instructions for the installation, operation, and maintenance of the Supermicro CSE-827HD-R1400B 1400W 2U Rackmount Server Chassis. This high-performance chassis is designed to house server components, offering robust power delivery and efficient cooling for demanding applications. Please read this manual thoroughly before proceeding with installation or operation.
2. 安全情報
怪我や機器の損傷を防ぐために、常に次の安全上の注意事項を守ってください。
- インストールやメンテナンスを行う前に、必ず電源を切ってください。
- Wear anti-static wrist straps when handling internal components to prevent electrostatic discharge (ESD).
- Do not operate the chassis with the cover removed unless specifically instructed for troubleshooting.
- すべての電気接続に対して適切な接地を確保してください。
- This chassis is heavy. Use appropriate lifting techniques or assistance when moving or installing it in a rack.
- Maintain adequate ventilation around the chassis to prevent overheating.
3. パッケージ内容
パッケージにすべてのアイテムが揃っていることを確認します。
- Supermicro CSE-827HD-R1400B 2U Rackmount Server Chassis
- 1400W High-Efficiency (1+1) Redundant Power Supply (pre-installed)
- 4x 80mm PWM Cooling Fans (pre-installed)
- Rack mounting rails (if included with your specific purchase)
- Accessory kit (screws, cables, standoffs)
- クイックインストールガイド(このドキュメント)
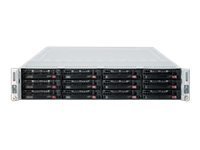
図3.1: Supermicro CSE-827HD-R1400B 2U Rackmount Server Chassis. This image shows the front view of the server chassis, highlighting its rackmount design and general appearance.
4. セットアップとインストール
Follow these steps for proper installation of the server chassis and its components.
4.1. ラックマウント
- Attach the provided rack rails to the server chassis sides using the designated screws.
- Mount the other end of the rack rails to the server rack posts, ensuring they are securely fastened.
- Slide the chassis into the rack until it locks into place.
4.2. マザーボードの取り付け
The chassis supports ATX motherboards.
- Remove the chassis top cover by unscrewing the retaining screws.
- Install the I/O shield into the chassis rear panel.
- Align the motherboard with the standoffs inside the chassis.
- 適切なネジでマザーボードを固定します。
4.3. ハードドライブの取り付け
The chassis supports 3.5-inch hard drives.
- Locate the drive bays.
- Mount each 3.5-inch hard drive into a drive tray.
- Slide the drive tray with the installed hard drive into the designated bay until it clicks into place.
- Connect the SATA/SAS data and power cables to each hard drive.
4.4.電源接続
- Connect the main 24-pin ATX power connector from the power supply to the motherboard.
- 8 ピン (または 4 ピン) CPU 電源コネクタをマザーボードに接続します。
- Ensure all peripheral power connectors (e.g., for GPUs, additional fans) are properly connected.
- Connect the AC power cords from the redundant power supplies to separate, grounded power outlets.
5. 操作手順
5.1.電源のオン/オフ
- 電源オン: After all connections are secure, press the power button on the front panel. The power LED should illuminate.
- 通常シャットダウン: オペレーティング システムを通じて正常なシャットダウンを実行します。
- 強制シャットダウン: Press and hold the power button for 5-7 seconds. Use only when necessary to prevent data loss.
5.2.LEDインジケーター
Refer to your motherboard manual for specific LED indicator meanings. Common indicators on the chassis front panel include:
- 電源LED: Indicates system power status (On/Off/Standby).
- HDDアクティビティLED: Flashes when hard drives are being accessed.
- Network Activity LED: Indicates network traffic (if integrated on the front panel).
6. メンテナンス
Regular maintenance ensures optimal performance and longevity of your server chassis.
- ほこりの除去: Periodically clean dust from the chassis interior, especially fan blades and heatsinks, using compressed air. Ensure the system is powered off and unplugged before cleaning.
- ファンの検査: Check cooling fans for proper operation and excessive noise. Replace any failing fans promptly.
- ケーブル管理 Ensure internal cables are neatly routed to avoid obstructing airflow.
7。 トラブルシューティング
このセクションでは、発生する可能性のある一般的な問題について説明します。
| 問題 | 考えられる原因 | 解決 |
|---|---|---|
| システムの電源が入らない。 | Power cables disconnected, faulty power supply, faulty power button. | Check all power connections. Verify power supply status LEDs. Test power button functionality. |
| ファンの騒音が大きすぎる。 | Dust accumulation, failing fan bearing. | Clean fans. Replace noisy or failing fans. |
| システムの過熱。 | Poor airflow, fan failure, dust buildup. | Ensure proper ventilation. Check fan operation. Clean dust from components. |
| Hard drives not detected. | データ/電源ケーブルが緩んでいる、BIOS 設定が正しくない、ドライブに障害がある。 | Verify all data and power cables are securely connected. Check BIOS/UEFI settings. Test drives in another system if possible. |
8. 仕様
| 特徴 | 詳細 |
|---|---|
| ブランド | スーパーマイクロ |
| モデル名 | CSE-827HD-R1400B |
| フォームファクター | 2U ラックマウント |
| マザーボードの互換性 | ATTX |
| 電源 | 1400W High-Efficiency (1+1) Redundant, 80 PLUS Gold Certified |
| 冷却ファン | 4x 80mm PWM |
| ハードディスクのフォームファクタ | 3.5インチ |
| 色 | 黒 |
| アイテム重量 | 68 ポンド |
| 製品寸法(奥行き×幅×高さ) | 奥行き28.5インチ x 幅28.5インチ x 高さ28.5インチ |
| 欧州連合 | 672042062768 |
| ASIN | B005KFBPBS |
9. 保証とサポート
For warranty information, please refer to the documentation provided with your purchase or visit the official Supermicro website. For technical support, product inquiries, or to report issues, please contact Supermicro customer service through their official channels.
オンラインサポート: www.supermicro.com/support
連絡先: Supermicroを参照してください web地域の連絡先の詳細については、サイトをご覧ください。